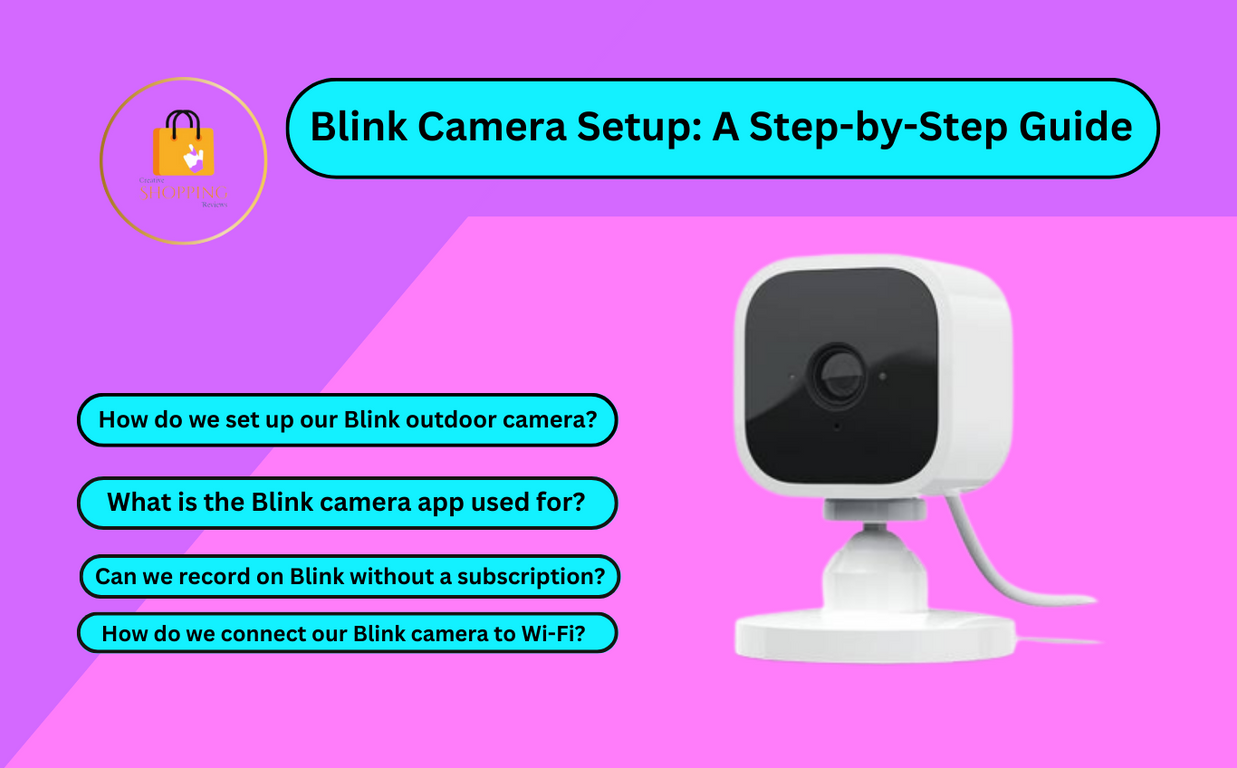
As technology continues to evolve, our living spaces are becoming more connected and intelligent. One key tool for enhancing our homes’ safety and security is the installation of surveillance devices such as the highly acclaimed Blink Indoor Camera. With its easy setup, clear video quality, and smart features like motion detection, it offers peace of mind that your home is under watchful eyes, even when you are not around.
Whether you are tech-savvy or a novice in the realm of smart devices, you may encounter some degree of trepidation at the thought of setting up your Blink Indoor Camera. The good news is that the process isn’t as daunting as you might think. This article is here to guide you through the methodical approach of installing the Blink Indoor Camera, making it a hassle-free experience.
This thorough guide will walk you through every step of the process, starting from the unboxing to the final step of the device configuration and application setup. You’ll learn about positioning the camera optimally, ensuring network compatibility, and understanding the different features and settings the device and its application offer. By the end of this comprehensive read, you’ll be well-versed in managing your Blink Indoor Camera for effective home surveillance.
Understanding the Features of the Blink Indoor Surveillance Cam
This unobtrusive surveillance device, known as Blink Indoor camera, offers comprehensive protection for homes with its array of smart features. Designed for convenient setup and seamless integration into any dwelling, its innovative perks contribute to maintaining overall security.
Outstanding Video Quality and Infrared Night Vision
The surveillance tool boasts an impressive 1080p HD video quality that ensures clear imaging during the day. Plus, it incorporates the advantage of infrared night vision for enviable clarity, even under low lighting scenarios. This means you won’t miss a thing no matter what time it is.
Motion Detection and Instant Alerts
Enhancing the Blink indoor cam’s functionality is its motion detection feature, automatically alerting users of any movement within its field of view. The instant alert system prompts notifications on your phone, giving you timely information about any unusual activity around your home.
Built-in Two-way Audio
Engage in two-way conversations courtesy of the security camera’s integrated speaker and microphone. Whether it’s to scare off thieves or check up on your pet’s well-being, the feature enhances your ability to communicating directly through the decision.
Long-lasting Battery Life and Cloud Storage
Rest assured, your security won’t be compromised even in instances of power outages, thanks to its two-year battery life. Plus, managing your surveillance video clips is trouble-free with the device’s complimentary cloud storage for easier retrieval and review of footages.
- Omnipresent home monitoring: With the Blink app, your home is virtually within reach, allowing you to keep an eye on your home from any location.
- Expandable system: The camera fits well into the Blink ecosystem, supporting up to 10 additional cameras for a more robust home surveillance network.
In a nutshell, The Blink Indoor Surveillance Cam presents comprehensive security components designed to protect one’s home from potential risks effectively. From high-resolution video capturing to immediate activity alerts, Blink’s indoor camera stands as a reliable tool in bringing peace of mind.
Opening Up Your Brand New Indoor Surveillance Device from Blink
The first step in setting up your new in-home surveillance system is getting your Blink Indoor camera out of its box. Exciting times! But let’s focus on doing it correctly.
Step one: Carefully handle the box
Start by handling the package with care. Inside this box is your key to upper-level home security. Ensure to place it on a clean, flat space. Then smoothly slide or lift any securing tape or stickers without violently shaking the box contents.
Step Two: Inside the Box
Opening the packaging reveals the important components nestled securely inside the box. These include:
- An indoor camera from Blink
- Camera mount
- AA Lithium batteries
- A power adapter
- USB Cable
Remember: Be sure to account for all of these items before proceeding. If you can’t locate any of these parts, reach out to Blink’s customer support for assistance.
Step three: Familiarizing Yourself with the Device
Take a moment to examine your new surveillance tool. You’ll notice its sleek design integrating itself seamlessly into your home decor. The camera has several key features, including an LED indicator, a microphone for audio capture, a speaker backplate, and even a reset button for troubleshooting.
Now that you’ve successfully unpacked your Blink Indoor camera, you’re one step closer to a more secure home. The next step will take you through the journey of mounting and installing this invaluable indoor camera.
Grasping the Basics of the Blink Indoor Camera and Its Parts
Before setting up the Blink Indoor Camera for home security, it’s essential to understand its makeup and the function of each component. The Blink indoor cam is a user-friendly device that enhances your home’s security by offering high-quality video surveillance.
Camera Unit
The main part of Blink’s Indoor Camera is the camera unit itself. Its primary function is to capture HD video. It comprises a motion sensor for detecting movement, infrared LEDs for night vision, and the camera lens. Additionally, the camera unit houses a microphone for picking up sounds.
Blink Sync Module
The Blink Sync Module is another crucial component of this home surveillance system. It serves as a communication hub between your Blink cameras and the internet. Thus, enabling streaming and storing video data on the cloud.
Camera’s Components
- HD Camera Sensor: For recording high-quality videos of your surroundings.
- Infrared Night Vision: Employs infrared LEDs to record videos in low-light or dark conditions.
- Motion Detector: Senses any movement in the view of the camera and triggers video recording or sends an alert.
- Built-in Microphone: Enables recording of sounds along with the video footage. However, it’s worth noting that the system does not support two-way audio.
The knowledge and understanding of these elements can allow users to optimize the use of their Blink Indoor Cameras, delivering its full capabilities as a home surveillance system.
Getting Your Blink Indoor Surveillance Camera Account Ready
The first crucial step in setting up your Blink Indoor Surveillance Camera is to create an account. This not only keeps your device secure but also allows you to seamlessly interact with a variety of features designed to enhance your home safety. Let’s explore the simple process of setting up your Blink Camera user account.
1. Download the Blink Application on Your Device
To start the account setup, you need to download the Blink app onto your smartphone or tablet. This app is readily available on Google Play Store for Android users and the Apple App Store for iOS users. Simply search Blink Home Monitor in the respective store and click on the ‘Install’ button.
2. Create a New Account
After installing the app, launch it and select ‘Create Account.’ Input your email address, create an optimal password (ensure it’s strong enough for enhanced security), and confirm it. Accept the terms and services, and your account creation process is complete.
3. Verify Your Email
Upon setting up the new account, you’ll need to authenticate your email address. Check your email for a verification message from Blink. Open the email and click on the verification link; this will automatically confirm your account and redirect you to the login page of the app.
4. Log into Your Account
Now, you’re all set to log into your new Blink user account. Simply input your email address and the password you set earlier and hit the ‘Log In’ button. Congrats! You’ve successfully set up your Blink Camera account. Keep this account secure, as it is your first-line defense in your home surveillance system.
5. Account management
Once you are logged into your account, you can easily add your new Blink Indoor Camera onto the device list. It is also recommended to keep your Blink App and Camera firmware up-to-date for the best security and experience.
How to Connect Your Blink Indoor Surveillance Camera with Your Mobile Device
Syncing your indoor surveillance equipment with your mobile device is a crucial step in the setup process. This will allow you to keep an eye on your property from virtually anywhere. The process is fairly straightforward, and this guide will walk you through each step.
Get the Blink App
First, navigate to your device’s app store and search for the Blink mobile application. Blink Home Monitor is the recommended app, it’s available on both the Google Play Store and the Apple App Store. Download and install it to your smartphone or tablet.
Creating Your Account
Once you have downloaded the application, open it to create your account. You’ll need to provide a valid email address and create a secure password. An email will be sent to the address provided for verification. After verifying, you’re ready to add your Blink Indoor Camera to your newly created account.
Adding Your Blink Indoor Camera
Your next step is adding, or ‘syncing’, your Blink Indoor Camera to your account. To do so, open the app and press the ‘+’ button to add a new system. Then, you’ll need to scan or manually enter the code found on the back of your camera. Follow the device pairing procedures as prompted by the app. Once the connection is successful, you should see a live feed from your camera on your app dashboard.
Note: Your smartphone and Blink Indoor Camera will need to be connected to the same Wi-Fi network for successful syncing.
Throughout the process, don’t hesitate to consult the Help Center within the Blink Home Monitor app or contact the customer support team for further assistance. Now, you are ready to control, monitor, and maintain the security of your home right at your fingertips!
Deciding on the Optimal Placement for Your Indoor Surveillance System
When it comes to home surveillance, determining the perfect spot for setting up your indoor security camera is crucial. One of the top-selling home security cameras is the Blink Indoor Camera. Below are some tips to assist you in picking out the best location for your Blink camera installation within your house.
Angles Matter
Consider placing your camera in a spot that maximizes the viewing angle. An elevated corner of the room is a good place to start, as it provides a wider coverage area. Bear in mind that your Blink camera’s lens has a field of view of 110 degrees. That means, the higher you place it, the more coverage you get. However, make sure your camera isn’t pointing directly at a light source to avoid distortions.
Think About Your Priority Areas
Think about what areas of your home you wish to monitor most. Is it the front door where strangers could potentially enter? Or perhaps the baby’s nursery? Maybe you have costly electronics in your living room you want to keep an eye on? Prioritize these areas for camera installation.
Make Use of Existing Infrastructure
Setting up your camera near a power source can save you a lot of trouble. Although the Blink Indoor Camera runs on batteries, being close to a power supply enables you to recharge the device without much effort when required. Also, consider the Wi-Fi signal strength in the potential camera location. Your Blink Indoor Camera will need a strong connection for seamless operation.
Hide the Camera, Not the View
While it’s essential to keep your camera out of sight to prevent tampering, ensure that it’s not completely hidden. Household objects should not obstruct the camera’s view. Keep it unnoticeably visible.
- Check camera’s view: After setting up, make sure to check the camera’s output. Your Blink app will help you to do that.
- Run through different scenarios: Imagine all possible scenarios, play them out, and adjust your camera placement accordingly.
- Ask for a second opinion: A fresh pair of eyes can spot something that you might miss, so, ask someone else to check the camera’s coverage too.
Process of Setting Up and Fixing the Blink Indoor Surveillance Camera
Setting up and mounting your Blink indoor surveillance camera is an easy and straightforward task, that you can do on your own. Before you start, ensure you have the necessary items, including the camera, the mount, two AA lithium batteries, and a screwdriver.
1. Preparing the Camera
Begin by inserting the two AA lithium batteries into your camera. After that, add the camera to your Blink Home Monitor app. You can do this by selecting the ‘+’ symbol at the home screen’s bottom right-hand corner. Follow the instructions given to finish the setup.
2. Positioning the Camera
After setting up the camera, the next step is to decide the best location for it. It should be somewhere with a clear and unobstructed view of the area you want to monitor. Remember, the camera’s range is limited to about 20 feet, so consider this when choosing your camera location. Additionally, for the best coverage, try mounting your camera in a corner.
3. Installing the Mount
Once you’ve identified the perfect spot, make a marker on the wall with a pencil where you intend to fix the mount. Attach the mount to the wall using a screwdriver and the provided screws. Ensure you securely fasten the mount to avoid any camera movement after installation.
4. Affixing the Camera
Finally, align the back of your Blink camera to the mount and rotate it clockwise until it is tightly fixed to the mount. Adjust the camera to capture the desired view. Remember to check the video feed from the camera on your Blink Home Monitor app to see if the camera coverage is as per your preference.
Note: Avoid mounting the camera on metal surfaces. This can interfere with the Wi-Fi signal, leading to a weak connection or even total loss of connectivity.
Tailoring Your Home’s Blink Camera Settings for Maximum Surveillance Effectiveness
Once your Blink indoor camera is installed, the next step is to fine-tune the settings to maximize your home surveillance experience. To achieve the optimum setup, several key factors should be taken into consideration. These include adjusting motion detection sensitivity, determining video quality and length, and tweaking audio settings.
Tuning Motion Detection
The motion detection feature plays a significant role in detecting any suspicious activity in your house. It is crucial to set the sensitivity to a level that is high enough to capture relevant activity without being triggered by false alarms. Your Blink app allows you to adjust this aspect conveniently. Accessibility to this feature can be navigated via the motion detection tab inside the camera settings. Remember, a higher setting will catch more motion but may cause faster battery drainage.
Video Quality and Length Adjustment
It is vital to find a balance between video quality and storage. If you have limited space, reducing the video quality or length can help manage storage constraints. If not, setting higher quality would provide a clearer video footage. The Blink app gives you the versatility to adjust these parameters to your liking.
Modifying the Audio Settings
Your Blink indoor camera comes with a built-in microphone which provides audio along with the video footage. It can be enabled or disabled in the audio settings tab. You can turn off this feature if the security demands are being fulfilled without the necessity of audio data.
- The motion clip length can also be adjusted. The default clip length is 5 seconds, but if you want a more detailed understanding of any motion detected, this can be increased up to 60 seconds.
- The ‘End Clip Early if Motion Stops’ feature stops the video recording once the motion is not detected, saving your storage and battery.
Therefore, by calibrating these settings, you can harness the full potential of your Blink indoor camera for a better home surveillance experience.
Finding Solutions to Frequent Problems with the Blink Indoor Security Camera
Even though the Blink Indoor surveillance camera is designed to keep your home secure with ease, it’s not uncommon to encounter a few hurdles along the way. Understanding how to resolve typical difficulties might help you maintain your system running smoothly.
Navigating through Blink Indoor Security Camera Challenges
Camera Can’t Connect to Wi-Fi
If your camera is having trouble connecting to Wi-Fi, the first thing to do is check your internet connection. Ensure that other devices are able to connect to the same network. If your other devices are connected but the camera is not, try moving the camera closer to the router or removing any objects that could be blocking the signal.
Camera Isn’t Recording
When your camera fails to record, make sure motion detection is turned on. It may not be able to record if it cannot detect motion. In addition, check that your device is not running out of storage or power.
Loss of Live View Access
In case you can’t access the live view, make sure your camera is not in sleep mode. Additionally, if your camera is only connected to a mesh network, it may experience difficulties. Try using a dual-band router instead.
Weak or Inconsistent Video Quality
Video quality issues can stem from numerous sources. The primary culprits are commonly a weak Wi-Fi signal or not enough light hitting the camera’s sensor. Consider altering the camera’s resolution settings or adding additional lighting to improve video quality.
- In case of weak Wi-Fi signal, experiment with the camera’s placement or consider using a Wi-Fi extender.
- Should lighting be an issue, you can enhance it either by adding more lights or by relocating the camera to a better-lit area.
To maintain wonderful footage quality and a dependable connection, regular maintenance and troubleshooting of the Blink Indoor camera should be carried out.
Boosting Your Household Security with More Blink Cameras
When it comes to ensuring the security of your home, the more eyes the better. Sprucing up your household safety with additional Blink indoor cameras can improve the surveillance coverage, providing additional layers of security to your home.
Expand Coverage
Each Blink indoor camera covers a specific field of view. By adding more of these devices, you can expand the detection area, potentially covering any blind spots in your home. This extensive coverage is particularly advantageous for larger households where single camera may not be enough.
High-Level Integration
The real strength of Blink’s indoor surveillance system lies in its seamless integration. All cameras are controlled from the same mobile app, providing you access to live feeds or stored clips from multiple areas in your home at the same time. With the help of this app, you can easily toggle between different cameras, offering unparalleled ease of use.
Optimizing Surveillance with Multi-Camera Installations
- Strategic Placement: Cameras should be installed at strategic locations which offer wide view of critical areas such as entrance, living room, or other areas where valuable items are present.
- Optimal Height: Cameras should be mounted at an appropriate height, generally a bit higher than the eye level to ensure they capture quality footage and are beyond reach of intruders trying to disable them.
- Camera Angling: Angling the cameras appropriately is essential to ensure that they cover maximum area and provide comprehensive surveillance.
Versatile and Convenient
Blink indoor cameras are wireless and battery powered, which make them easy to install anywhere without the need for any power cords or cables. They are versatile and can be placed, mounted, or moved easily according to your needs. With additional Blink cameras in place, you can rest assured that your house is well-guarded, leaving no room for any security lapses.
Keeping Your Indoor Surveillance Camera from Blink in the Best Condition
As part of your home security system, Blink Indoor Cameras require regular maintenance and timely updates. Following these steps, you can ensure your cameras perform optimally and extend their lifespan.
Caring for Your Security Camera
Regular Maintenance: As a general maintenance practice, we recommend you regularly dust the camera lens with a soft brush to ensure clear imagery. Remember to handle your home surveillance device gently to avoid any unnecessary damages.
Placement: Ensure that your camera is placed in a location that optimizes its full viewing capacity. Avoid positioning it next to sources of light that might affect the image quality or areas where its view may be obstructed.
Keeping Your Camera Up-To-Date
Updating your indoor surveillance camera software is crucial for security purposes and to add new features or improvements. While updates are automatically performed, you can also manually initiate them when connected to your Wi-Fi network.
- On your Blink app, visit the Systems tab, and select the appropriate camera system name.
- In the settings menu, choose Update Firmware, followed by Update Now.
- Your camera will then download and install the update automatically.
Remember to keep the camera connected to a power source during the update process so it doesn’t switch off and interrupt the downloading and installation.
Lastly, always ensure you have varying backups for your surveillance footage and regularly change your camera system’s passwords for heightened security. By maintaining and updating your Blink Indoor camera, you can enjoy reliable, high-quality home surveillance.
FAQ: How to install blink indoor camera
How often should I update my Blink Indoor Camera?
It’s advised to check for updates regularly for your Blink Indoor camera. Blink automatically sends out software updates to your camera, but you have to initiate the update in the app.
Why is it important to regularly update my Blink Indoor Camera?
Regular updates ensure that your Blink Indoor Camera operates with the latest features and security enhancements. Updates often include important bug fixes, performance improvements, and additional features or improvements.
How can I verify if my Blink Indoor Camera is up to date?
In the Blink app, you can check the firmware version of your camera. If an update is available, it will be indicated there. Simply follow the instructions in the app to update your camera’s software.
What should I do if my Blink Indoor Camera is malfunctioning after an update?
If your Blink Indoor Camera isn’t working correctly after an update, try resetting it. If that doesn’t work, contact Blink’s customer support team for further assistance.
How can I maintain my Blink Indoor Camera apart from regular updates?
Maintaining your Blink Indoor Camera also involves keeping it clean and free of dust, placing it properly to avoid falls and damage, and replacing batteries or checking to make sure your camera is well charged if it is a rechargeable model.