The advent of smart home devices has revolutionized domestic safety and security. Modern innovations such as Google’s Nest Camera offer unparalleled utility and convenience. This step-by-step guide is designed to take you through the process of setting up your Google Nest Camera with ease.
Setting up your Google Nest Camera might initially seem a daunting task. However, rest assured that with this guide, you will be guided through each process, ensuring you are up and running without unnecessary hassles. Remember, the purpose of this guide is to simplify the process and negate any technical challenges you might encounter.
The process starts with unboxing your camera and ends with you being able to view your home remotely from your mobile device. We understand that every step is crucial. Hence, this guide avoids technical jargon and explains each step in a straightforward manner, without any assumption of prior knowledge. Furthermore, we appreciate that the configuration of your Nest Camera is just as important. Therefore, we also include steps to properly configure your camera to your desired settings.
The end goal is to provide you with a comprehensive tutorial that covers not just the initial setup, but also configuring and using your Google Nest Camera effectively. Without further ado, let’s dive in and get you started.
Getting to Know the Features of Your Google Nest Camera
The Google Nest camera is a highly advanced piece of technology designed to provide a reliable security solution for homeowners and businesses alike. Understanding the key capabilities of this gadget can help derive its full benefits and better manage your security needs.
Stunning Visual Clarity
One of the compelling features that set the Google Nest camera apart from its competitors is its visual clarity. This state-of-the-art camera records video in High Definition (HD), ensuring each footage captured is crisp and clear. Thanks to its remarkable resolution, users can see the finer details with ease, spotting intruders or key incidents.
Night Vision
Another noteworthy feature is its night vision ability. This is incredibly useful for maintaining security during the dark hours of the night. Irrespective of the lighting conditions, Nest camera records high-quality video, ensuring no incident goes unnoticed
24/7 Recording
Unlike some other cameras that only record when motion is detected, the Google Nest camera can keep a round-the-clock eye on your property. The continuous video history feature allows you to go back and review footage from any time period within your device’s cloud storage schedule.
Smart Features
The Google Nest camera incorporates several intelligent features that make property surveillance a cinch. Features such as familiar face alerts, activity alerts, and the ability to differentiate between humans and pets can give you more specific and actionable security information. Evidently, these details regarding the sophisticated capabilities of the Google Nest camera clearly demonstrate why it’s a preferred choice for many security-conscious individuals.
Installation and Maintenance
Despite its advanced technology, the Google Nest camera installation process is relatively straightforward and does not require specialized skills. Additionally, maintenance requirements are minimal, as the device is built to withstand various elements.
Contents of the Google Nest Security Camera Package
After purchasing your new Google Nest Security Camera, the first step before setting it up is understanding what’s included in the package. This camera is known for its superior surveillance capacities, improved with smart technology from Google. Let’s delve into what you’ll find once you open the box:
The Components
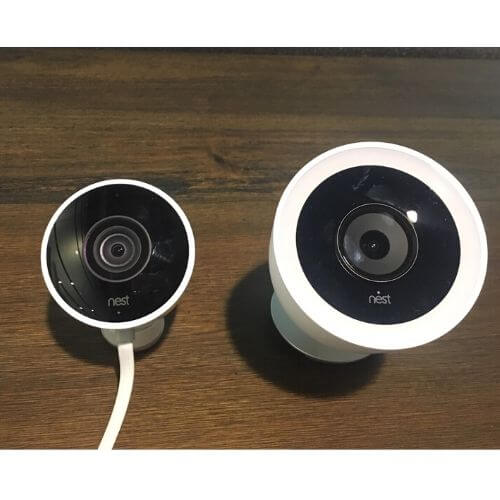
- Nest Cam: The Nest camera itself is the key component in the box. With an aesthetically pleasing design, the camera is sleek and compact. It comes with a base that allows you to place it anywhere, from flat surfaces to walls and magnetic surfaces.
- Power Adapter and Cord: The camera operates using a power adapter and a long cable that comes with it. The power cord spans a length of 10 feet, providing plenty of leeway to position the camera.
- Documentation: The box also includes a quick start guide and a safety/warranty guide. These provide insights into how to use the product safely without causing damage. They also lay out the terms of your camera’s warranty.
- Mounting materials: The package includes a wall plate and screws for the purpose of mounting your camera on a wall or any other vertical surface.
Keep in mind that the Google Nest Cam’s operation requires a Wi-Fi connection. It’s also essential to have a compatible phone or tablet with the Google Home app installed. Once you find these items in your box, set them aside gently, you are ready for the setup!
Determining the Optimal Installation Spot for Your Google Nest Security Camera
If you want your Google Nest Security Camera to serve its purpose efficiently, picking the right spot for installation is essential. The ideal location should provide a broad view of the area you want to monitor, have a stable Wi-Fi signal, and be safe from environmental damage. Various factors need to be taken into consideration before you can finalize the best placement.
Identify the Monitoring Objective
Before deciding on the placement of your Google Nest camera, you need to specify the purpose of the monitoring. If you want to keep an eye on the exterior of your house, the camera should be installed at a higher elevation, pointing towards potential entry points. However, if you’re going to monitor the inside, then points of entry such as doors and windows or areas with valuable items would be the best spots.
Wi-Fi Connectivity Check
Consistent Wi-Fi connectivity is essential for your Google Nest Camera to work efficiently. Choose an installation spot that’s within the range of your Wi-Fi router. You must also ensure that the spot will enable the camera to communicate interference-free with the router even when other devices are connected, as a bad connection can lead to choppy or no footage.
Consider the Environmental Conditions
Environmental conditions such as sunlight, rain, or snow can affect the camera’s operation. Although Google Nest Cameras are designed to withstand harsh weather conditions, direct exposure to these elements can damage the camera or distort the captured images. Strategically mounting your camera under eaves or awnings can provide the requisite protection and ensure an uninterrupted view.
- Finding a location which aligns with your monitoring purpose
- Checking the Wi-Fi connectivity at your chosen spot
- Evaluating and addressing the environmental impact
Hence, planning beforehand and considering these factors can help ensure your Google Nest Camera functions optimally, providing you with a clear and unobstructed view of your property.
Procedure for Setting Up and Attaching Your Google Nest Camera
Installing and mounting your Google Nest Surveillance device involves a simple and straight-forward process. The task, which is easily doable even if you are not tech-savvy, can be successfully accomplished in a few steps. Please note: it’s crucial to adhere to these steps in order to ensure optimal functioning and longevity of the device.
Step-by-Step Installation Approach
Before starting the installation and mounting procedure of the Google Nest Surveillance device, ensure you have the necessary equipment such as screws, a wall plug, mounting bracket, and a drilling machine (if necessary).
- To start with, download the Nest App on your mobile device and create a Nest Account if you haven’t done it already. Sign in to your Nest Account and select the Add product option.
- The application will then guide you on scanning the QR code located on your camera. Scanning this code essentially adds your Google Nest Camera to your account.
- Now, plug in your camera and ensure it’s connected to the internet. Follow the prompts in the app to add your home Wi-Fi details to the camera.
- Once your camera is all set up in the app and showing a live video feed, proceed to mount your Nest Camera.
Mounting the Nest Camera
- First, determine the ideal location to mount your camera. This should be a spot that covers a broad area for maximum surveillance. A corner of a room, for instance, would be suitable.
- Next, use the mounting bracket that came with your device as a guide to mark the drilling points on the wall.
- Proceed to drill holes on your mark points. Insert the wall plug into the drilled hole, then use the screws to fix the mounting bracket on the wall.
- Finally, attach your Google Nest Camera to the mounting bracket. It should fit snugly and securely.
Remember: always set the camera’s settings according to your preferences through the Nest App. Options such as activity zones, notifications, sharing and more can be customized here.
Linking Your Google Nest Camera to Your Wireless Network
To ensure your Google Nest Camera functions correctly and can transmit video feeds to your connected device reliably, it’s crucial to correctly connect it to your home’s wireless network. This process only requires a few steps and can guide you through using the Google Home app.
Step 1: Download and Set Up the Google Home App
To begin, you’ll need to have the Google Home app downloaded and installed on your smartphone or tablet. This application allows you to set up, manage, and control your Google Nest Camera. It is available for both Android and iOS. Upon opening the app for the first time, follow the prompts to create a Google Home account or log in if you already have one.
Step 2: Add Your Google Nest Camera to the App
With the app installed and your account set up, you’re now ready to add your Google Nest Camera. Open the Google Home app and tap on Add and then Set up device. Select the Set up new devices option and then choose your home network from the list. Follow the app’s instructions, which will guide you on how to connect your camera to your wireless network.
Step 3: Connect to Your Wi-Fi
When prompted, input the details for your Wi-Fi network.
- First, select your Wi-Fi network from the list provided.
- Then, enter your network password to allow the Nest Camera to connect to your Wi-Fi.
- Once entered, tap Next to proceed. Your device should now connect to your Wi-Fi network.
If you’ve followed these instructions, your Google Nest Camera should now be connected to your Wi-Fi and ready for use. Remember, your camera requires a strong and stable Wi-Fi connection to function optimally, so ensure that it’s within range of your router.
Configuring Your Google Account for Use with Your Nest Cam
The first step in getting your new Nest Cam up and running involves configuring your existing Google Account for use with the camera. This allows you to make full use of the features that the camera provides, and makes the management of your security easier and more streamlined. These steps give you a comprehensive tutorial on how to do this.
Google Account Configuration Steps
- Sign into Your Google Account: The first step is to sign into your Google account. If you do not have a Google account, you will need to create one.
- Launch Nest App: Next, you will need to download and open the Nest app on your smartphone or device. Follow the prompts to sign in using your Google account.
- Add Your Nest Cam: Once you are signed into the app, you will need to add your Nest Cam to the app. Select the plus (+) icon in the upper right corner to do this. Follow the on-screen instructions to add your Nest Cam.
- Grant Permissions: After you have added your Nest Cam, make sure to grant the necessary permissions for the app to access your camera. This can include permissions to use your phone’s camera for scanning codes, location permissions, and storage permissions.
After you have followed these steps, your Google account should be fully configured for use with your Nest Cam. Now, you can access your camera feed from your phone, set up notifications, and control other settings directly from your device.
Note: Be mindful while granting permissions. Grant only those permissions that are absolutely required for the functioning of your Nest Cam. Your privacy is essential, and not all apps need access to all types of information.
As a whole, the set-up procedure is simple and intuitive, ensuring that even tech novices can successfully configure their Google account with the Nest Cam. So, enjoy the enhanced security and peace of mind brought by your new Nest Cam.
How to Set up Your Nest Camera Using the Google Home App
It’s a fairly straightforward process to get your Nest Camera up and running using the Google Home App. With this app, you can have your Nest Camera setup completed in just a few simple steps.
Step 1: Download and Install the Google Home App
You will need the Google Home app on your smartphone or tablet. This is available for both Android and iOS devices. Visit the Google Play Store or the Apple App Store, search for the Google Home app and then download and install it.
Step 2: Set up Nest Camera on Google Home App
- Launch the Google Home app and sign in with your Google account.
- From the home screen, tap on the ‘+’ icon located at the top left of the screen.
- Select the ‘Set up device’ option, then choose the ‘Set up new devices in your home’ option.
- Follow the on-screen prompts to connect your camera with the app.
Step 3: Configure Camera Settings
Once your Nest Camera is connected to the Google Home app, you can customize its settings according to your preferences. Navigate to the camera settings to configure options like the camera’s name, video quality, microphone settings, and activity notifications.
Step 4: Test Your Nest Camera
Now that your Nest Camera is set up and configured in the Google Home app, it’s time to test it out. From the Home screen of the app, tap on the camera’s name to view its live feed. This will help you ensure that the camera is working properly and that you’re happy with its video quality and area coverage.
By following these easy steps, you can enjoy the convenience and security advantages that a Google Nest Camera offers right from your Google Home app.
Personalizing the Settings of Your Google Nest Surveillance Device
Personalizing your Google Nest surveillance gadget allows you to optimize its functionality and suit your individual needs. Here are some steps on how you can adjust the settings to your liking:
- Begin by launching the Google Home app on your mobile device. This is where you can access the settings of your Nest device.
- On the home screen of the app, look for the option ‘Cameras’. This will provide you a list of all your surveillance gadgets connected to the app.
- Select the Nest device of which you would like to modify settings. This will open up a new screen with various settings available.
Notification Settings
In the settings interface, you will find ‘Notifications’. Clicking this option allows you to manage notifications specific to the device. For instance:
- Activity Alerts: This setting enables the device to send you alerts when it detects motion.
- Sound Alerts: This sends notifications to your phone when the surveillance apparatus detects noise such as a baby crying or dog barking.
- Familiar Face Alerts: This feature, only available on specific Nest models, sends alerts when it recognizes familiar faces.
Video Settings
Under the ‘Video’ settings, you can also adjust:
- Video Quality: Select your preferred video resolution.
- Night Vision: Adjust the sensitivity level for your device’s night vision.
The settings of your Google Nest camera can be tailored to your preference. From adjusting notification types to video resolution, this step-by-step guide helps in setting up your Google Nest camera to its optimal functionality.
Grasping the Night Vision and Real-Time Video Capabilities of the Google Nest Camera
Among the array of remarkable attributes inherent in the Google Nest Camera, the Night Vision and Live Video features are particularly impressive. These functionalities help to enhance the security capabilities of the device, providing a comprehensive surveillance solution regardless of the time of day.
Getting to grips with the Night Vision feature
This feature is designed to detect and display clear images even in low light conditions. Infrared LEDs installed in the camera help in illuminating the area the camera is pointed at, when it gets dark. As a result, even in the absence of visible light, you’re still able to view a clear image or video. It is important to note that the camera automatically transitions between normal and Night Vision according to changes in the ambient lighting.
A look into the Live Video feature
One of the primary security needs is the ability to monitor your premises in real-time. This is where the Live Video feature comes into play. By providing real-time video streaming, it allows users to view what is happening in their homes or offices directly from their smartphones, tablets, or computers. This instant access facilitates quicker reactions to possible security threats.
- With the Live Video feature, users can:
- Monitor their premises anytime and anywhere as long as they have an internet connection.
- Receive prompt notifications in case the camera detects any movement.
- Communicate directly with people on their premises through the built-in two-way audio function.
In summary, the combination of Night Vision and Live Video features allows users to make the most out of both day and night surveillance, ensuring no activity goes unnoticed.
Resolving common Google Nest Camera Installation Problems
Here are some tips and tricks for issues you might encounter while setting up your Google Nest Camera. The setup process can be straightforward, but sometimes, you may come across difficulties when attempting to connect and configure your device.
Network Connection Issues
If you’re having trouble creating a network connection between your camera and your device, follow these steps:
- Check if your Wi-Fi network is running on 2.4GHz or 5GHz. Google Nest Camera supports both, but some older devices may have trouble connecting to 5GHz networks.
- If your device and camera are too far apart, bring them closer together to ensure a good connection. Walls, furniture, and other objects can interfere with Wi-Fi signals.
- Restart your router. This is a common step in troubleshooting network issues, including Wi-Fi interruptions and lags.
Camera Not Responding
If your Google Nest Camera isn’t responding or won’t turn on, try these steps:
- Ensure the power cable is properly connected to the camera and the power outlet.
- Check for any damage to the power cable that might be causing the problem.
- Try a factory reset if the above steps don’t work. Keep in mind, this will erase all data and settings.
Camera Image Quality Problems
Bad camera quality can be due to a range of issues, but here are few solutions you might consider:
| Problem | Solution |
|---|---|
| Poor nighttime video quality | Make sure the camera isn’t pointed directly at a light source. Check if night vision is enabled in settings. |
| Glare or sun reflections in the camera’s view | Try to move the camera to a different location or adjust its angle. |
| Foggy or blurry video | Clean the camera lens with a soft cloth. |
Finally, if your troubleshooting hasn’t improved the situation, it may be time to reach out to the Google Nest customer support. They are equipped to help solve more complex issues or arrange a replacement if your device is faulty.
Ensuring Your Google Nest Camera Operates Smoothly and Safely
To make sure your Google Nest Camera continues to provide top-notch security, it’s crucial to maintain the device and keep it updated. Scheduled maintenance and timely updates play key roles in helping your camera perform at its best capability and provide the latest features and security fixes. Here’s how you can accomplish these tasks.
Maintenance of your camera involves regular cleaning to keep the lens clear of dust and debris, which can hamper the video quality. Be sure to use a dry, clean cloth or compressed air for cleaning. Also, periodic checking of the mounting and security of the camera is vital. Ensure your camera’s charge (if it’s wireless) or power supply is appropriately maintained, and its connection to your Wi-Fi network is stable and robust.
Making Sure Your Camera is Up to Date
Your Google Nest Camera engages in automatic updates to make sure you always have the most recent improvements and security fixes. However, to ascertain that your device is running the most recent version, you can check the software version from the settings in your Nest App. Here’s how to do it:
- Open your Google Nest App on your mobile device.
- Tap on the ‘Settings’ tab.
- Under the device information section, you’ll find the software version of your camera.
If you see an update is available and your device hasn’t automatically updated, ensure your device is connected to the Wi-Fi network and plugged into power. Also, resetting your device can sometimes trigger the update process.
By properly maintaining and keeping your Google Nest Camera updated, you ensure your home security system performs the best. Take these steps to safeguard your home with top-notch video surveillance.
FAQ: How to setup google nest camera
How do I update the software of my Google Nest Camera?
Google Nest Cameras update their software automatically. If there is any new update available, your device will receive it automatically over the Wi-Fi connection.
What should I do if my Google Nest Camera is offline?
First, make sure your camera is plugged into a power outlet and your Wi-Fi is working. If it’s still offline, you can try to restart your camera from the Google Home app.
How can I clean my Google Nest Camera?
Use a soft, dry, lint-free cloth to wipe the lens of your Google Nest Camera. Do not use any kind of solvents or cleaning solution as they could damage the lens.
Why is my Google Nest Camera’s video quality poor?
This can be due to a weak Wi-Fi signal, interference from other devices, or internet speed. Try to move your camera closer to your Wi-Fi router or improve your internet connection.
What should I do if my Google Nest Camera won’t connect to Wi-Fi?
Try resetting your Wi-Fi router first. If that doesn’t work, go to the Google Home app, select your camera, and then click on the settings. From there, select ‘Wi-Fi connection’ and follow the instructions to reconnect your camera to the Wi-Fi.
Can I use my Google Nest Camera outdoors?
Only specific models of Google Nest Cameras are designed to be used outdoors. Please check your camera model’s specifications to ensure it is suitable for outdoor use.
Why is my Google Nest Camera not detecting motion?
Check your camera’s settings in the Google Home app to make sure motion detection is enabled. If it still doesn’t work, try resetting the camera to its factory settings and setting it up again.
How do I reset my Google Nest Camera to its factory settings?
First, remove the camera from your account using the Google Home app. Then, use a pin to press and hold the reset button found at the back of your camera until the status light turns off.
How can I update my Google Nest camera software?
Google Nest cameras automatically update their software when new versions are released. This process is performed wirelessly over the internet, so no physical intervention is required from your end. However, ensure that your camera is always connected to the internet for seamless updates.
How do I maintain the physical condition of my Google Nest Camera?
Keep your Google Nest Camera clean and dust-free. Wipe it gently with a dry, soft cloth. Avoid using any abrasive cleaners or solvents which may cause damage. If the camera is outdoors, check it periodically to ensure it’s securely mounted and not being affected by weather conditions. Always remember, though the Google Nest outdoor cameras are weatherproof, they are not waterproof.