Table of Contents
Unboxing and Initial Set-Up of My New Blink Camera
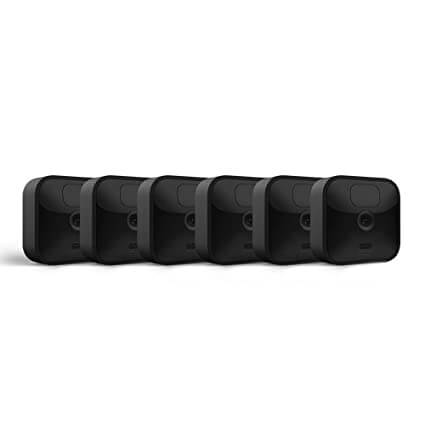
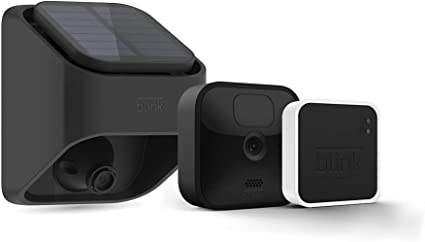
Hello there, tech enthusiasts! I hope you’re all doing fantastic. Today, I’m super excited to share my hands-on experience unboxing and setting up the increasingly popular Blink Outdoor Camera. For those who might be unaware, Blink Outdoor is a battery-powered security camera that helps you monitor your home day and night, rain or shine. It’s an Amazon product, so quality is a given, and with its robust features, it stands as a strong contender in the security camera market.
Unboxing the Blink Camera
My Blink Outdoor Camera arrived in a neat, compact package that revealed the care taken by the folks at Blink. The box contains:
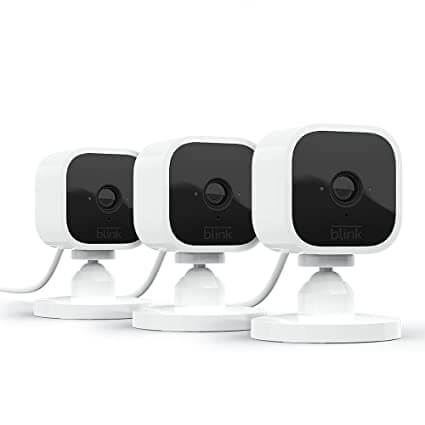
- The Blink Outdoor Camera (of course!)
- Two AA lithium batteries
- A mounting bracket
- A set of screws
- A user guide
The minimalist design of the camera instantly caught my eye – compact, sleek, and aesthetically pleasing. It’s a nice change from the more traditional, bulky security cameras.
Starting the Initial Set-Up
Alright, enough about the looks – let’s move on to the set-up process, which, to my surprise, was a breeze. Blink offers a user-friendly app named Blink Home Monitor, available for both iOS and Android platforms.
Here’s the step-by-step guide to get you started:
- Download and Install the App: Head over to the App Store or Google Play Store and search for “Blink Home Monitor”. Click on the download button and wait for the app to install.
- Create Your Account: Open the app and click on ‘Create Account’. You’ll need to provide a valid email and create a password. Ensure you choose a secure password to protect your footage and privacy.
- Add the Blink Outdoor Camera: Once logged in, tap on the plus icon to add a new device. You’ll need to scan the QR code found at the back of your camera. This process helps pair your camera with the app.
- Insert the Batteries: Time to power up your camera! Open the back of your camera and insert the two AA lithium batteries provided. You’ll hear a little chirp, confirming it’s powered up and ready to go!
- Place Your Camera: You’re almost there! Attach the mounting bracket to your chosen location and fix your Blink camera onto it. Be it above the front door or overseeing your backyard, make sure it covers the areas you’d like to keep an eye on!
- Finalize Set-Up in the App: Go back to the Blink Home Monitor app. Follow the on-screen instructions to finalize your camera’s settings, such as adjusting the sensitivity, setting up alerts, and defining the camera’s name (Front Door, Backyard, etc.).
And there you go! You’ve successfully set up your Blink Outdoor Camera! If you need additional help, the Blink support page and user guides are just a click away.
In a world where we’re constantly striving for peace of mind, setting up a Blink Outdoor Camera could be your first step towards a safer home. This personal experience of mine was seamless, and I hope yours will be too! Stay tuned for more reviews and setup guides. Happy monitoring!
My Journey to Understanding the Best Blink Outdoor Camera Settings
Getting Acquainted with the Blink Camera Settings
Once you’ve done the initial setup of your Blink Outdoor Camera (which, by the way, is super easy – check out my previous post on setting up Blink Outdoor Camera), you’ll want to familiarize yourself with the various settings.
Trust me, investing a little time in understanding these can significantly enhance your camera’s efficiency and security. Let’s dive in!
Crucial Blink Camera Settings
Motion Detection
A highlight of Blink Outdoor is its advanced motion detection. Here’s how you can customize it:
- Sensitivity: You can adjust the sensitivity from 1 (low sensitivity) to 9 (high sensitivity). I found setting it to 5 to be a good balance, reducing false alerts from minor movements like leaves blowing in the wind.
- Activity Zones: This is a godsend! You can set specific areas in the camera’s field of view to monitor for motion. My advice? Focus on entrances and windows for optimal security.
Video Settings
Enhancing your video settings is key to crystal clear footage.
- Video Quality: The Blink camera offers three options – Saver, Best, and Enhanced. Being a quality enthusiast, I opt for ‘Enhanced’. But remember, higher video quality consumes more battery.
- Clip Length: This controls how long the recorded video will be when motion is detected. I’ve found that a 20-second clip length usually captures the entire event.
- Early Notification: Enable this to get notifications as soon as motion is detected. It’s a feature I truly appreciate for immediate alerts.
Infrared Settings
Night security is as vital as daytime. Thankfully, Blink Outdoor offers customizable infrared settings.
- IR Intensity: Adjust the infrared light’s intensity for night vision. I set it to ‘Medium’ for the best night footage in my yard.
- Control: You can set it to Auto, On, or Off. ‘Auto’ works best for me as it automatically turns on the infrared light based on the lighting conditions.
System Settings
- Status LED: This indicates whether your camera is recording or not. I keep it on for transparency with my visitors.
- Microphone: Decide if you want to record audio with the video. Given local regulations and privacy concerns, consider this one carefully.
Remember, all these settings can be found in the Blink Home Monitor app. The process can seem a bit overwhelming at first (it did to me!), but once you’ve adjusted these settings to your liking, you’ll appreciate the flexibility and control you have over your camera’s performance.
Tweaking these settings not only helps me make the most out of my Blink Outdoor Camera but also provides me with a sense of security. I hope my experience and suggestions help you in your journey to a safer home. For any assistance, don’t hesitate to check the Blink support page. Stay secure!

Optimizing the Blink Outdoor Camera for Daytime Monitoring: My Personal Experience
My Struggle with Default Settings
When I first installed my Blink Outdoor Camera, I left the settings as default, expecting a one-size-fits-all solution. But the resulting performance during the daytime was less than satisfactory. The camera was frequently triggered by moving shadows and birds, leading to unnecessary alerts and quicker battery drain. It was clear to me that tweaking the settings was in order.
Taming the Motion Detection
One of the key features of the Blink Camera is its motion detection capability. To avoid false alerts, I had to optimize the motion detection settings. Here’s what I did:
- Sensitivity: I reduced the sensitivity to avoid alerts from insignificant movements like fluttering birds or swaying trees. Setting it to 3 worked well for me, but you might need to experiment a bit to find the sweet spot for your environment.
- Activity Zones: A fantastic feature of the Blink camera is the ability to define activity zones. After a few trials, I set my camera to focus on the front gate and driveway, where any activity would be most significant.
Balancing Video Quality and Battery Life
Here’s the tricky part. The better the video quality, the more battery life is consumed. Finding a balance between these two aspects was vital.
- Video Quality: While the ‘Enhanced’ video quality setting provides a clear, detailed image, it was a bit heavy on the battery. So, I settled for the ‘Best’ setting, which provides a great video quality without draining the battery too quickly.
- Clip Length: Initially, I had set the clip length to record for a full minute whenever motion was detected. But after noticing that most activity was captured within the first 15-20 seconds, I adjusted the clip length to 20 seconds, thereby conserving battery life.
Enhancing the Overall Daytime Monitoring
Apart from motion detection and video quality, there were a few other settings that I tinkered with for optimal daytime monitoring.
- Microphone: I turned on the microphone to capture audio along with the video. This feature came in handy when I wanted to understand the context of some events.
- Early Notification: This feature is a lifesaver! I turned it on to receive notifications as soon as motion was detected.
- Status LED: This was more about being transparent. I keep it on during the day to let visitors know that they are being recorded.
With all these changes, my Blink Outdoor Camera has been performing exceptionally well during the daytime. All it needed was a bit of tinkering with the settings using the Blink Home Monitor app. If you need more help, Blink’s support page has a wealth of resources.
Remember, there’s no universal ‘best setting’. What worked perfectly for me might not work as well for you. So don’t hesitate to play around with the settings and find the perfect balance that suits your needs. Happy tweaking!
Discovering the Optimal Settings for Night-Time Monitoring with the Blink Outdoor Camera
Night-Time Monitoring: The Initial Hurdles
When I first set up my Blink Outdoor Camera, the default settings seemed fine during the daytime. But when night fell, I started to face some challenges. The camera was either too sensitive, leading to an overflow of alerts, or not sensitive enough, making me miss important activities. It became clear that understanding the night settings was crucial for effective monitoring.
Customizing Infrared Settings for Night Vision
Night-time monitoring heavily depends on the Infrared (IR) settings. Here’s how I tweaked them for the best results:
- IR Intensity: After some trial and error, I found setting the intensity to ‘High’ provided the best illumination for my outdoor space.
- Control: I set this to ‘Auto’. It ensures that the IR automatically switches on when the lighting conditions are low.
Managing Motion Detection for Night-Time
The motion detection settings I had for daytime monitoring were not effective during the night. Here’s what I did:
- Sensitivity: I increased the sensitivity to 7. The increased sensitivity proved useful during the night as it helped detect significant movements effectively.
- Activity Zones: I kept the same zones as during the day but re-evaluated them to ensure they were still effective given the different lighting conditions.
Video Quality and Clip Length: Striking a Balance
Maintaining the balance between video quality and battery life is as important at night as it is during the day.
- Video Quality: I maintained the ‘Best’ setting for night-time as well. The camera still delivered clear footage without draining the battery excessively.
- Clip Length: I found that a clip length of 25 seconds worked well for me during the night. It was enough to capture most activity without overburdening the battery.
Ensuring the Best Night-Time Performance
A few more adjustments helped me optimize the camera’s night-time performance.
- Microphone: Just as during the day, I kept the microphone on. The audio recording was especially helpful when the video was not clear enough due to darkness.
- Early Notification: This is a feature I appreciate greatly. With it enabled, I get notifications as soon as the camera detects motion.
Through a combination of adjustments using the Blink Home Monitor app, I was able to optimize the settings of my Blink Outdoor Camera for night-time monitoring. If you’re feeling a little lost, the Blink support page has lots of helpful information.
Remember, the perfect settings depend on your individual situation. So, don’t hesitate to experiment until you find the optimal configuration for your environment. Keep tweaking, and happy monitoring!
My Quest for Perfect Motion Detection with the Blink Outdoor Camera
Initial Encounters: The Motion Detection Conundrum
When I first started using the Blink Outdoor Camera, I was thrilled by its array of features. However, I soon realized that the default motion detection settings were a bit too sensitive for my liking. I was constantly receiving alerts from minor movements such as passing cars and fluttering leaves. Clearly, adjustments were in order.
The Journey to Optimized Motion Detection Settings
Motion detection is a fantastic feature that can provide excellent security if fine-tuned correctly. Here’s how I customized mine:
Adjusting Sensitivity
The first thing I adjusted was the sensitivity setting. This determines how responsive the camera is to motion. After some experimentation, I found that setting it at 5 resulted in a good balance, minimizing false alerts without missing any significant activities.
Setting Up Activity Zones
The Activity Zones feature is a true game-changer. It allows you to specify areas in the camera’s field of view to monitor for motion. I set up my activity zones to focus on points of entry such as the front door and backyard gate, which significantly reduced the number of unnecessary notifications.
Configuring the Retrigger Time
The retrigger time determines the cooling-off period between motion alerts. Initially, my camera was set to alert me every 10 seconds, which was far too frequent for my needs. After playing around with this setting, I found that a retrigger time of 45 seconds was ideal for my home.
The Fruit of My Labors: Optimal Motion Detection
Thanks to these adjustments made through the Blink Home Monitor app, my Blink Outdoor Camera is now set up to provide me with only relevant motion alerts. I no longer find myself sifting through a barrage of notifications triggered by insignificant movements.
Lessons Learned and Parting Thoughts
Every home is unique, and the optimal settings for your Blink Outdoor Camera may be different from mine. Don’t hesitate to experiment and tweak these settings to suit your specific needs. The journey may seem daunting initially, but the resulting peace of mind makes it all worthwhile.
For any additional help with your Blink Outdoor Camera settings, check out the Blink support page. It’s a great resource filled with guides and troubleshooting tips.
I hope my personal experience can guide you in your quest to perfect your Blink Camera’s motion detection settings. May your journey be as rewarding as mine. Happy tweaking!
Managing Battery Life and Storage on the Blink Outdoor Camera: A Personal Deep Dive
An Introduction: Blink Outdoor Camera and Its Power Dilemma
Initially, while I was enchanted by the smart features of the Blink Outdoor Camera, I was equally baffled by its battery consumption. The device operated on two AA lithium batteries and, with default settings, the juice drained much quicker than I expected. Moreover, storage was another point of concern, with recorded clips filling up rapidly.
My Strategy to Prolong Battery Life
One thing you’ll need to remember about the Blink camera is that the battery life significantly depends on its settings and usage. Here are the steps I took to optimize it:
1. Optimize Video Settings
Both video quality and clip length can dramatically impact battery life.
- Video Quality: While the ‘Enhanced’ setting provides impressive detail, it tends to drain the battery faster. I found the ‘Best’ setting a great middle ground, offering decent video quality without significant battery consumption.
- Clip Length: I originally set the clip length to 60 seconds, but soon realized most events were captured within the first 20-30 seconds. Shortening the clip length to 30 seconds reduced battery strain.
2. Tweak Motion Detection
I adjusted the sensitivity settings to reduce false alerts from minor movements. I also set the retrigger time to a higher value, reducing the frequency of alerts and thereby conserving battery life.
Managing Storage: Making the Most of Blink’s Cloud Service
The Blink Outdoor Camera offers cloud storage through the Blink Subscription Plan. However, managing it efficiently can be a bit tricky.
1. Clip Length and Quality
Just as with battery life, adjusting the clip length and quality can have a significant impact on storage. Lowering these settings helps in conserving storage space.
2. Use the Scheduled Delete Feature
To avoid manual deletions, I used the Scheduled Delete feature in the Blink app. It automatically deletes clips after a certain period, keeping the storage neat and manageable.
3. Download Important Clips
For any crucial footage that I wanted to keep, I would download the clip directly to my device before it was scheduled to be deleted.
Through a combination of these adjustments using the Blink Home Monitor app, I’ve been able to significantly extend my Blink camera’s battery life and manage storage more efficiently.
I hope my personal experience proves helpful on your journey to mastering your Blink Outdoor Camera. As always, the Blink support page is there for any further assistance. Remember, your perfect settings may differ based on your individual needs. So keep experimenting, and happy tweaking!
Fine-Tuning Privacy and Security Settings on my Blink Outdoor Camera
A Matter of Importance: Privacy and Security
In the era of interconnected devices, privacy and security are of paramount importance. Having a camera that monitors your space 24/7 should also respect your privacy and secure your data. And this is where the Blink Outdoor Camera shines, offering a range of settings that allow you to customize your privacy and security.
How I Enhanced Privacy with my Blink Camera
When it comes to privacy, the Blink Outdoor Camera provides several handy features. Here’s how I took advantage of them:
1. Scheduling My Camera
By scheduling my camera to be active only during certain hours, I was able to maintain a level of privacy without compromising security. I simply used the scheduling feature in the Blink Home Monitor app to set the camera to be active only when I’m usually away.
2. Utilizing Activity Zones
I set up Activity Zones to monitor specific areas of interest and ignore others. This way, I could exclude areas where privacy is more critical, such as windows or certain indoor spaces.
Fortifying Security with the Blink Outdoor Camera
While privacy is important, a security camera’s primary purpose is to keep your home safe. Here’s what I did to ensure maximum security:
1. Optimizing Motion Detection
By fine-tuning the sensitivity and retrigger time, I ensured the camera would alert me only for significant motions, making each alert something worth my attention.
2. Two-Factor Authentication
To secure access to my camera feed and recorded clips, I activated two-factor authentication on my Blink account. This provides an additional layer of security beyond just the password.
3. Regular Software Updates
I set my device to automatically update its software. Regular updates from Blink often include security patches, which are crucial in keeping the device secure against potential threats.
Balancing Privacy and Security
While it’s essential to optimize your camera for security, it’s equally important to maintain privacy. The Blink Outdoor Camera offers enough flexibility in its settings to achieve a balance that respects your privacy without compromising on security.
My journey with the Blink Outdoor Camera has taught me that optimizing privacy and security settings is key to making the most out of this fantastic device. The Blink support page is a great resource if you’re looking for more guidance or encountering issues.
Always remember that while I’ve shared my personal settings, your ideal settings may differ based on your specific needs and preferences. So, don’t be afraid to experiment and tweak. Happy customizing!
Unleashing the Power of Blink Outdoor Camera Through Smart Home Integration
An Introduction: Blink and the Smart Home Realm
The Blink Outdoor Camera comes equipped with plenty of impressive features. But what truly unlocks its potential is the ability to integrate with other smart devices. As an avid smart home enthusiast, I was eager to see how Blink would fit into my existing setup.
Blink and Amazon Alexa: A Dynamic Duo
One of the most seamless integrations I’ve discovered is between the Blink camera and Amazon’s voice assistant, Alexa. Alexa’s ability to control the camera, stream footage to an Echo Show device, and arm or disarm the system based on routines has been incredibly helpful.
To link the two, I followed these simple steps:
- Enable the Blink SmartHome skill in the Alexa app.
- Link my Blink account to the Alexa app.
- Discover devices in the Alexa app to find my Blink camera.
With this setup, I was able to use voice commands such as, “Alexa, show me the backyard,” and instantly have the live feed displayed on my Echo Show device.
The Blink Camera and IFTTT: Crafting Custom Automations
For those unfamiliar with IFTTT, it’s a platform that allows different smart home devices to interact based on custom rules or “Applets”. By connecting my Blink camera to IFTTT, I was able to create personalized automations, enhancing my home security.
For example, I set up an Applet that turns on my smart lights whenever the Blink camera detects motion at night. Not only does this scare off potential intruders, but it also provides clear footage for later review.
Integration with SmartThings: Enhanced Home Security Ecosystem
I found that pairing the Blink camera with SmartThings significantly enhanced my home’s security ecosystem. With this integration, I could control all my devices from one platform, setting up complex automations that keep my home safe.
My Journey Troubleshooting Common Issues with the Blink Outdoor Camera
Issue 1: Camera Not Detecting Motion
A few weeks into using the Blink camera, I noticed it wasn’t picking up certain motions in its field of view. Initially, I was puzzled. But after some digging, here’s what I discovered:
- Adjust Motion Detection Sensitivity: In the Blink Home Monitor app, I found the option to adjust the motion detection sensitivity. Increasing the sensitivity helped the camera detect smaller movements.
- Reposition the Camera: I realized that the camera’s position might affect its detection capabilities. Adjusting the angle to cover high-traffic areas better resolved the issue.
Issue 2: Short Battery Life
Although the Blink camera is marketed to last up to two years on a single pair of AA lithium batteries, I found that my batteries were draining faster than expected. Here’s how I improved battery life:
- Reduce Clip Length: I realized that longer clips were consuming more battery. So, I reduced the clip length from the default 60 seconds to a more reasonable 30 seconds.
- Optimize Video Quality: While high video quality provides better footage, it can significantly drain the battery. Changing the video quality from ‘Enhanced’ to ‘Best’ offered a decent compromise.
Issue 3: WiFi Connectivity Issues
Occasionally, my Blink camera had issues staying connected to WiFi, resulting in choppy live views and missed recordings. Here’s what worked for me:
- Check WiFi Signal Strength: The Blink app displays the WiFi signal strength for each camera. If it’s low, consider moving the camera closer to the router or using a WiFi extender.
- Update Router Firmware: Old router firmware can cause connectivity issues. Ensuring my router was up-to-date helped improve the connection.
Issue 4: Camera Going Offline Unexpectedly
At times, my Blink camera would go offline without any apparent reason. This was a bit tricky to solve, but here’s what worked:
- Check for Interferences: I found that certain electronic devices can interfere with the camera’s signal. Moving these devices away from the camera helped it stay online.
- Reset the Camera: If all else fails, a good old reset can work wonders. I removed the batteries, waited for a few minutes, then reinserted them. This forced the camera to reboot and resolve minor glitches.
Remember, the troubleshooting journey is all about patience and persistence. The Blink support page is a great resource if you’re facing any issues.
My experience taught me that even the best tech gadgets can face hiccups. But fear not! With a bit of patience and understanding, troubleshooting the Blink Outdoor Camera can be a manageable and even rewarding task. Happy troubleshooting!
The Ultimate FAQ Guide to the Blink Outdoor Camera
Does the Blink Outdoor Camera Require a Subscription Service?
The Blink Outdoor Camera does not require a subscription to operate. However, if you wish to take advantage of the Blink Subscription Plan, you can access additional features such as cloud storage for recorded clips.
Can I Use the Blink Outdoor Camera Indoors?
Absolutely! Despite its name, the Blink Outdoor Camera works perfectly fine indoors. In fact, I’ve had one set up in my living room for months now, and it’s been a great addition to my home security setup.
Does the Blink Outdoor Camera Work with Alexa?
Yes, it does. I’ve personally set up my Blink camera to work seamlessly with Alexa. With this integration, I can easily arm or disarm the camera, or even view the live feed on my Echo Show device using simple voice commands.
How Long Does the Battery Last on the Blink Outdoor Camera?
The battery life can last up to two years under normal use with the included AA lithium batteries. However, from my experience, factors such as clip length, video quality, and the frequency of motion alerts can impact the battery life.
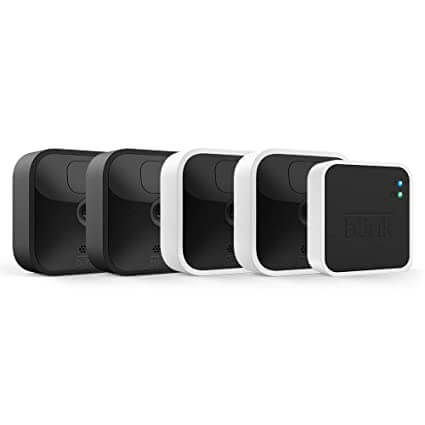
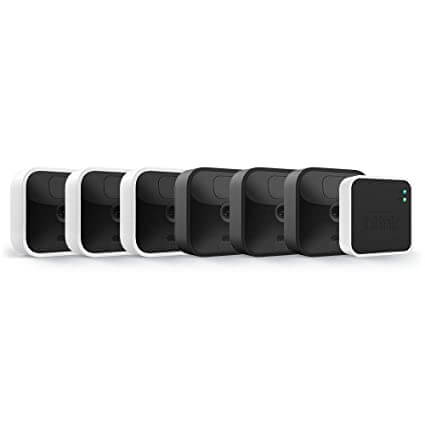
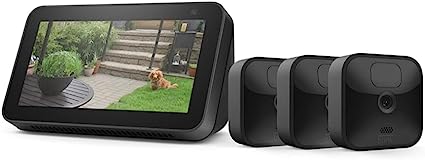
Can I Set Up Multiple Blink Outdoor Cameras?
Yes, you can add as many Blink cameras as you’d like to a single Blink sync module. I currently have three cameras set up around my property, and they all connect to the same module.
Does the Blink Outdoor Camera Record Continuously?
By default, the Blink Outdoor Camera does not record continuously. It records short clips when it detects motion. However, with the introduction of the Blink Mini and Indoor cameras and a subscription, you can enable continuous recording.
How do I open the Blink app on my compatible device?
To open the Blink app, simply locate the app icon on your compatible device and tap on it.
How can I adjust the camera settings to enable recording?
Open the Blink app, select the camera you want to configure, and navigate to the settings page. From there, you can customize the camera’s recording settings.
Is it possible to adjust the motion sensitivity of the Blink camera?
Yes, you can adjust the motion sensitivity by accessing the camera’s settings in the Blink app and finding the motion sensitivity slider. Move the slider to your desired level of sensitivity.
How can I disable audio settings on my Blink camera?
To disable audio settings, go to the camera’s settings page in the Blink app and toggle off the audio option.
Can I set my camera to clip early if motion stops?
Yes, you can enable the “End clip early if motion stops” feature in the camera settings of the Blink app. This allows the camera to stop recording if it detects that motion has ceased.
How do I trigger my Blink camera to start recording?
The Blink camera is triggered to start recording automatically when it detects motion within its designated motion zone.
What can I do to reduce false alarms with my Blink camera?
Adjusting the motion sensitivity level and defining a specific motion zone can help reduce false alarms with your Blink camera.
How do I toggle the sensitivity level of my Blink camera’s motion sensor?
In the Blink app’s camera settings, you’ll find a toggle or slider to adjust the sensitivity level of the motion sensor.
Can Blink cameras be used for both indoor and outdoor purposes?
Yes, Blink offers both indoor and outdoor camera models for your security system needs.
How can I set certain times of the day for my Blink camera to record?
Within the Blink app’s camera settings, you can create a schedule to define specific times when the camera should be actively recording.
What is the purpose of the LEDs on the Blink camera?
The LEDs on the Blink camera serve as indicators, providing visual feedback about the camera’s status and activity.
What does PIR stand for in relation to Blink cameras?
PIR stands for Passive Infrared, which is the type of motion sensor technology used in Blink cameras to detect motion.
How can I adjust the video recording length on my Blink camera?
By accessing the camera’s settings in the Blink app, you can find a clip length bar that allows you to adjust the duration of video recordings.
How can I define a specific motion zone for my Blink camera?
In the Blink app’s camera settings, you can define a specific area you want the camera to focus on as its motion trigger zone.
How can I ensure long battery life for my Blink camera?
To maximize battery life, you can adjust the camera’s sensitivity settings, reduce false alarms, and limit the camera’s usage during certain times when you’re not around.
How can you trigger your Blink Outdoor camera to start recording when it detects motion?
To trigger your Blink Outdoor camera, you can adjust the customizable settings in the Blink app on your compatible device. Simply tap the camera tile, then tap the settings icon. From there, you can adjust the camera sensitivity and set the video quality to optimize the camera’s view as a motion trigger.
Can Blink Outdoor cameras send temperature alerts?
No, Blink Outdoor cameras do not have temperature alert capabilities. They are primarily designed for security purposes and do not include built-in temperature sensors.
What are the best settings for Blink cameras for optimal performance in outdoor environments?
The best settings for Blink cameras in outdoor models depend on your specific needs and preferences. However, some commonly recommended settings include adjusting the camera sensitivity to capture motion accurately, setting the video quality to ensure the best quality footage, and positioning the camera in a strategic location to cover the desired area. Experimenting with these settings will help you find the optimal configuration for your needs.
How can you adjust the recording duration on your Blink camera?
To adjust the recording duration on your Blink camera, open the Blink app on your compatible device and tap the camera tile. From there, tap the settings icon and scroll down to find the “End Clip Early If Motion Stops” option. Enabling this setting means that the camera will stop recording if it detects no motion during a specified time period, helping to conserve battery life and storage space.
How can you turn on the audio recording feature for your Blink Outdoor camera?
To turn on the audio recording feature for your Blink Outdoor camera, open the Blink app on your compatible device and tap the camera tile. From there, tap the settings icon and scroll down to find the “Audio Recording” option. Enable this setting to allow the camera to record audio along with the video footage, which can be a great way to ensure comprehensive security coverage and help you keep a better track of events happening in your camera’s view.
I hope this FAQ session provided some valuable insights and helped answer some of your questions. As always, if you have more questions or face any issues, the Blink support page is a fantastic resource.
Remember, the world of tech is vast and ever-evolving. Keep experimenting, keep learning, and most importantly, keep asking questions. Happy exploring!