Security is a major concern in today’s society, and there are numerous technological tools available to aid individuals in securing their homes or businesses. One such popular device is the Nest Camera. However, there can be instances where you need to disconnect your Nest Camera from your account. Whether it’s due to a hardware upgrade, selling your device or troubleshooting some issues, understanding how to properly perform this task is crucial.
When these scenarios happen, you might find yourself stumbling repeatedly on how to unlink your Nest Camera from your subscription. Our guide is good news for you, as it will give you detailed, easy-to-follow steps to effectively remove your Nest Camera from your account.
It’s important to note that the removal process may vary depending on the platform you use for managing your Nest services- be it through a PC or a mobile device. Nonetheless, the key steps remain relatively consistent. This comprehensive guide aims to simplify this task with clear instructions, ensuring you experience a smooth and hassle-free process.
A Concise Preface on the Nest Surveillance Camera
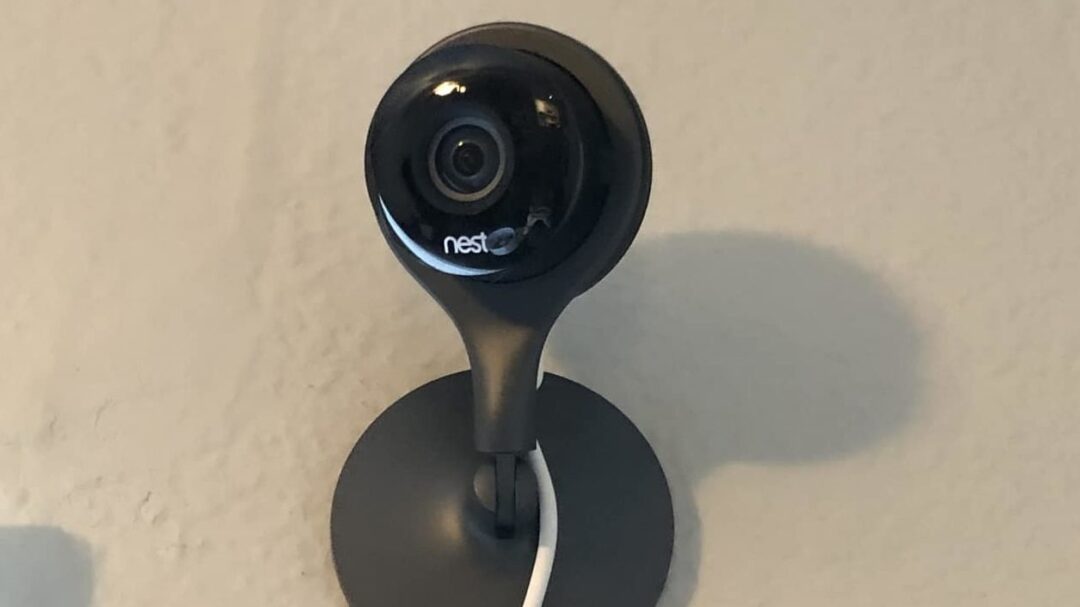
The Nest security equipment is a cutting-edge innovation in today’s world of digital home surveillance systems. This overview aims to provide a succinct look into the multifaceted nature of this device.
Key Features:
- High Definition Video Quality: What makes Nest stands apart from its contemporaries is its stellar video quality. The Nest camera boasts of a 1080p HD video quality.
- Alerts: It provides real-time alerts when the surveillance tool spots any motion or sound.
- Continuous Video Recording: This amazing gadget can monitor round the clock and has a feature to record non-stop for up to 30 days.
- Smart Integration: Nest camera can be seamlessly integrated with other smart home devices.
The Nest camera is a popular option for those desiring a full-fledged security setup in their homes. Thus, it is crucial to understand how to control and maintain devices in your account, including add or remove a device smoothly.
Why it’s Crucial to Properly Disconnect a Nest Cam from Your User Profile
Ensuring proper disconnection of a Nest Cam from your user profile is extremely vital. When performed correctly, it safeguards your privacy, ensures data security, and facilitates a seamless transition in case you sell or gift the camera to another user. Here’s why it’s critical to execute this task correctly:
Preserving Your Personal Information
From the viewpoint of safeguarding personal information, unbinding your Nest Cam in the right way is crucial. Your security camera has possibly recorded countless hours of footage containing sensitive information. If it’s not correctly removed from your account, there’s a risk of your private data being exposed or misused.
Ensuring Optimal Performance for the Next User
Another key factor to consider is the future use of the camera. If you plan to sell or gift the camera, proper disconnection ensures the next user can set it up smoothly. Otherwise, the new user might encounter setbacks due to the camera still being associated with your network or account.
Preventing Unauthorized Access
Disassociating your Nest Cam properly also helps to prevent unwanted access to the camera’s live feed. If you fail to remove the camera correctly, it leaves room for potential security breaches, as theoretically, one could access the camera as long as it’s still linked to your account.
Maintaining Data Security
Lastly, your Nest Cam’s connection to your account could serve as an entry point to other connected devices. Disconnecting the camera correctly helps to maintain overall data security across your other Nest products, making it harder for potential threats to have access to your data.
Getting Ready to Disconnect Your Nest Camera
Before you can promptly and effectively disconnect your Nest camera from your personal account, a few necessary preparations are required. This will not only ensure a smooth disconnection process but also safeguard against unexpected issues. So, it’s very crucial to take time and understand these preparatory measures.
Understanding the Implications of Removal
It is essential to know what disconnection implies. When you disconnect or erase the Nest camera from your account, it will no longer be linked to your home’s security network. You will not be able to control it through the Nest app, and it won’t record video history anymore. Therefore, make sure you are ready for these changes.
Backup Important Data
Before proceeding with the removal process, ensure all necessary data and video history is backed up. This is essential as all video history will be deleted from the account once the camera is removed. Prior to removal, you can store videos of interest in the cloud or downloading them to your local storage.
Check Camera and App Status
Make sure that the camera is online and functioning properly. If it is offline or malfunctioning, it may interfere with the disconnection process. Similarly, the Nest app should be updated to the latest version.
Prepare Camera for Reset
To remove the Nest camera from your account, it needs to be reset. Keep the camera powered unless instructed otherwise. A ladders or a chair might be needed to reach the camera if it’s mounted. The Nest camera also has a QR code at the back which could be necessary for some steps so make sure you can access it comfortably.
First Approach: Deleting a Nest Camera from your Profile via the Smartphone Application
A Nest camera linked to your account gives you extra security features for your home or office. But there could be reasons why you may need to disconnect a Nest camera from your account, such as shifting to a different security system or selling the camera. This step-by-step guide will help you in eliminating a Nest cam from your profile using the mobile application.
Step 1: Open the Nest App
Begin by launching the Nest application on your smartphone. Stay assured that this method works for both Android and iOS platforms. Ensure you’re logged in to your account.
Step 2: Locate the Camera
After signing in to your account, you will reach the ‘home’ tab of the app. Locate the feed of the camera that you wish to remove. Pressing on the video feed will open up more options.
Step 3: Access Settings
On the camera’s screen, locate the ‘gear’ icon typically placed at the top-right corner. Tapping the icon will lead you to the settings menu of the camera.
Step 4: Delete Camera
Once inside the settings menu, scroll down till you find the option ‘Remove Camera’. Press the option and confirm your selection to remove the camera from your account. Keep in mind that by doing so, all the video history of that specific camera will also be deleted.
Note: The Removed camera can be re-added to your account or another account at any time, but the video history will not be recovered once deleted.
Conclusion
If you have followed all the steps above correctly, the Nest camera should now be successfully removed from your account using the mobile application. Keep in mind to unlink your account from the camera if you intend to give away or sell the device.
Procedure to Detach Your Nest Security Camera from the Smartphone Application
Disconnecting your Nest security camera from your mobile application may be necessary due to various reasons like troubleshooting, changing your mobile device, or replacing the camera. Here is a simple and comprehensive procedure of how you can execute this task.
Steps to Detach the Security Camera via the App
The following instructions guide you on how to disconnect your Nest security camera through the smartphone application:
-
Unveil your mobile device and open the ‘Google Home’(Google leading product) application to commence the unlinking process.
-
Navigate to the top left of the application’s interface, tap your house’s name(where the camera is fixed) to select the device to unlink.
-
Once you have located your device, tap the Google Nest Camera’s settings icon, which is designated with three vertical dots lining up next to each other.
-
A down-drop menu will appear, scroll through the menu and select the ‘Remove device’ option.
-
A confirmation window will pop-up, asking you to confirm that you really want to unlink your device. Here, you should tap the ‘Remove’ button to finalize the process.
Upon completion of these steps, your Nest camera will be detached from your mobile application. However, the camera will not be completely erased from your Google account. If you wish to completely delete the camera data from your account, be sure to follow the necessary steps for your specific mobile device to be fully protected.
Note: The system to unlink a Nest camera is slightly different for various mobile devices. Always ensure to follow the instructions that match your specific device for successful results.
Procedure 2: Deleting Your Nest Cam from Your Profile via Desktop
If you’re looking to disconnect your Nest Camera from your specific profile using your desktop, follow these easy steps for a seamless process:
Step 1: Accessing the Nest Website
On your laptop or desktop, go to the Nest website and log in. Use the account information associated with the Nest Camera you wish to remove. Make sure you’re using Nan up-to-date web browser to prevent any potential issues.
Step 2: Heading Over to the Settings Menu
Upon successful login, navigate to the settings option, generally denoted by a gear icon. This is usually located in the upper right corner of the dashboard. Click on it.
Step 3: Selecting Your Nest Camera
From the settings menu, select the ‘Home’ option, then choose the Nest Camera you’re wishing to remove. It should be visible under the ‘Devices’ segment of the ‘Home’ section.
Step 4: Removing the Nest Camera
Having selected the right Nest Camera, find and click the ‘Remove Camera’ option. This should be visible on the current page. A confirmation dialog box will pop up. Click ‘Confirm’ to finalize the removal process.
Note: Once removed, all previously recorded data linked to the camera will be permanently deleted and can’t be recovered. You should therefore ensure you back up any relevant footage before initiating the removal process. Should you wish to reconnect the camera later, a re-setup will be needed.
Employing these steps using a computer ensures a successful disconnection of the Nest Camera from your account easily and efficiently.
Guideline for Disconnecting Your Nest Camera from Your Profile Using a Desktop
Accessing and controlling your Nest camera through your account provides convenience and easy monitoring. But if you decided to disconnect your Nest camera from your account, just follow these step-by-step instructions and you’ll achieve the said task with ease using a personal computer.
Procedure for Unplugging Your Nest Camera from Your Profile via Computer
First Step: Open the Nest App on your desktop
To begin, locate the Nest app on your desktop and open it. If you’ve not yet installed it, make sure to download it from the official website or app store and install it. After installation, log in to your account.
Second Step: Choose the Camera to Remove
Once you’re logged in, you will see all the cameras linked to your account. Browse through the list, and select the Nest camera you wish to unlink.
Third Step: Access the Camera Settings
After selecting the camera, go to the settings of the selected camera. This is typically located at the top-right corner of the screen depicted by a gear icon.
Fourth Step: Select the ‘Remove Camera’ Option
In the camera’s settings, scroll down and you will see an option to Remove Camera. Click on it. Please take note that this action is irreversible and you will lose all the history linked to your camera. Make sure you’ve saved all necessary data before proceeding.
Fifth Step: Confirm the Action
Finally, to completely remove the camera from your account, you need to confirm your action. After confirmation, your Nest camera will be disconnected from your account, and you can no longer view its stream through your Nest app.
After successfully carrying out the steps above, you should have successfully deleted your Nest camera from your account using your computer. Should you wish to link it again in the future, you will need to set it up as a new device.
Problems You Might Encounter When Unlinking Your Nest Camera from Your Account
During the process of disconnecting your Nest surveillance device from your user account you may encounter a number of issues that can lead to complications. Understanding these issues is a step towards resolving them promptly.
Difficulty With The Unlinking Process
One of the primary issues that users may encounter is difficulty in navigating through the actual unlinking process. It involves a series of steps that require careful and correct execution. Instructions might be overlooked or misinterpreted leading to unsuccessful attempts in removing the camera from your account.
Connection and Compatibility Problems
Another issue that can arise involves problems with internet connections, which can impede successful unlinking of your Nest Camera. Additionally, compatibility issues with the application or software used may also provide a hurdle when trying to separate the surveillance device from your account.
Resetting the Nest Camera
A potential challenge might be resetting the Nest Camera itself. It is possible that the device may not correctly reset, thus preventing the removal from your account. This would require additional steps to resolve before the surveillance device can be successfully removed.
- Software glitches
- A surge in electricity
- Malfunctions or errors in the hardware.
Understanding and identifying these possible challenges will enable a quicker resolution and successful removal of the Nest Camera from your account.
Safeguarding Yourself During the Disconnection of Your Nest Security Camera
Safety is paramount when trying to disconnect your Nest monitoring camera from your account. While disconnecting a Nest security camera might seem straightforward, taking specific precautions can help you avoid potential harm or damage.
Unplugging From Power Source
Before attempting to disconnect your security camera, make sure it is unplugged from any power sources. This reduces any risks linked with electric shock. Do not merely switch it off, physically disconnect it from the power supply to ensure safety.
Using Appropriate Tools and Protection Gear
Next, you need to ensure you have the right tools for removing the camera. Using inappropriate tools could cause damage and could potentially harm you. Make use of a ladder for those out-of-reach places, and remember to follow standard guidelines for using a ladder safely. Always wear protective gloves in case you accidentally touch exposed wires during the process.
Handling Camera
While handling your Nest camera, handle it lightly to prevent internal damage. To prevent harm, make sure the surface beneath the camera is clear. If the camera accidentally falls, it will not hit anything that can cause injury.
Stored Footage
Last, it is vital to remember that when you remove your Nest camera, all the stored footage is deleted. Make sure to back up any crucial video before following the steps to remove the device.
By adhering to these safety recommendation, you will be able to remove your Nest camera safely and efficiently. Always remember, you must handle these devices cautiously to ensure no harm is caused to you or the device.
Advantages of Appropriately Disconnecting Your Nest Surveillance from Your Profile
Ensuring that you’re adept at properly disconnecting your Nest surveillance from your profile comes with immense advantages. To begin with, it’s an essential step to maintaining your information privacy. When you no longer require the Nest camera, it’s necessary to break off its link with your account to prohibit any unintended access to your video recordings.
Also, it’s vital to comprehend that it helps in maintaining comprehensive control over your devices. Understanding how to disconnect your Nest camera allows you to effectively manage your home automation setup, particularly if you’re planning on installing a new device or substituting the old one.
Database Sanity and Personal Security
Retaining data integrity and order in your profile database is another profound advantage. It shields you from unwarranted confusion brought about by surplus data transported by a device which is no longer in use. This advantage goes a long way in maintaining database sanity in your account.
Lastly, accurate disconnection of your Nest camera boosts your personal security. One of the primary objectives of getting a Nest camera is to ramp up security levels. Therefore, making sure you properly disconnect it from your account once it’s no longer in use is crucial, as it provides you with extra assurance that no one can access your feed.
- Privacy protection – Ensures that only authorized users have access to your camera footage.
- Control over devices – Allows you to manage your tools effectively ensuring no device is operating unsupervised.
- Database stability – Avoids the chaos of unwanted data by maintaining order in your profile.
- Enhanced personal security – Provides assurance that your camera feed is not under unauthorized viewing.
Considering Other Options After Disconnecting Your Nest Camera
When you have successfully unlinked your Nest camera from your profile, you may feel like a gap has been left in your home surveillance system. However, fear not, there are many effective alternatives to Nest cameras that you can consider. They offer varied features and capabilities that might better suit your specific needs. Let’s explore some of these substitutes.
Amazon Ring
Amazon Ring is a great choice for home security. It offers a wide range of innovative security devices like video doorbells, smart lighting, and comprehensive security camera options. You can always stay connected to your home and never miss a thing.
Arlo Pro 3
Arlo Pro 3 is another reliable replacement you may consider. It offers 2K video, color night vision, and a wide-viewing angle, ensuring you get a better look at your surroundings. It is also weather-resistant, making it versatile for both indoor and outdoor use.
Wyze Cam
If you’re operating on a budget, Wyze Cam can be a sensible choice. It delivers high-definition images and comes with free cloud storage, providing an overall great value for its price.
- Amazon Ring: Offers innovative security devices for complete home surveillance
- Arlo Pro 3: Provides 2K video and a wide-viewing angle for a detailed observation
- Wyze Cam: Delivers high-definition images and free cloud storage at an affordable price
Thus, disconnecting your Nest camera is not the end of video surveillance for your home. Many other brands can offer excellent service and may even surpass the features initially enjoyed with Nest cameras. Evaluate the requirement for your security, consider the alternatives above and make an informed decision.
FAQ: How to remove nest camera from account
What alternatives can I consider after removing my Nest Camera from my account?
You could consider alternatives such as Arlo Pro, Ring, Logitech Circle, or Wyze Cam as all of these offer similar capabilities and could be a better match based on your specific needs.
Which home security camera systems are good alternatives to Nest?
There are several good alternatives to Nest. These include the Amazon Cloud Cam, Arlo Pro 2, Ring Spotlight Cam, or even the Wyze Cam v2 which is a budget option.
What are some affordable alternatives to Nest Camera after removal?
If you’re looking for more affordable alternatives, you can consider brands like Wyze, Blink, and Yi. These brands offer home security cameras at a lower price range compared to Nest.
Is there any wireless alternative to Nest Camera after removing it?
Yes, there are wireless alternatives to the Nest Camera like the Arlo Pro 2, Ring Stick Up Cam, and Blink XT2. These cameras are free from wires, making installation much easier.
I removed my Nest Camera, what are some alternatives that offer free cloud storage?
Alternatives to Nest Camera that offer free cloud storage include brands like Wyze which offers a 14-day free cloud storage, and Eufy that provides a local storage and doesn’t require a monthly fee.