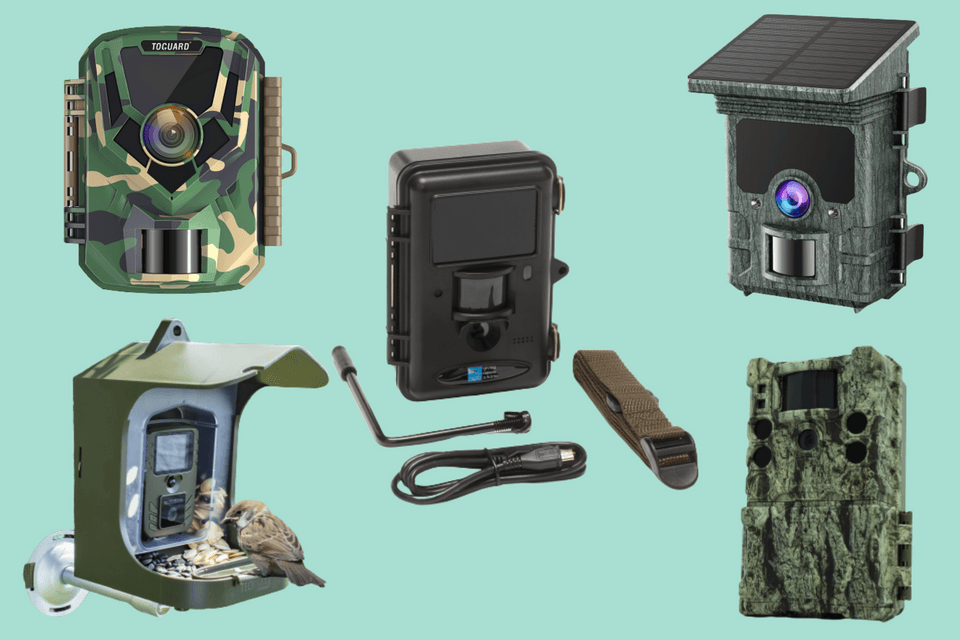
This article covers a complete guide on resetting your trail cameras, taking you reliably through each phase. Whether you’re experiencing irregularities with your device or want to clear out old settings, we’re here to assist. With this guide, we aim to unravel how to revive your surveillance equipment effectively, without any hassles. Our objective is to ensure that you make the most out of your outdoor activities by keeping your gear in perfect condition.
For those who are new to this, the idea might seem daunting. However, the resetting process is straightforward, provided you follow the right procedure. Our approachable, step-by-step guideline will make it a breeze for you. So, roll up your sleeves, as we take you through the procedure of resetting your trail camera to its original state, enhancing its performance and reliability.
Gaining Insight into the Significance of Reconfiguring Your Wildlife Trail Camera
Regularly resetting your wildlife trail camera is a critical practice that guarantees capturing high-quality images and footage. Understanding the importance of this aspect can contribute significantly to enhancing your trail camera’s productivity and longevity. Resetting ensures your device is functioning optimally and provides an opportunity to redefine your camera settings according to the changing wildlife patterns.
When you frequently reset your camera, you maintain it at peak performance by avoiding potential dysfunctions and glitches. Furthermore, updating your camera settings retains its relevance as it allows you to adjust according to shifting environmental conditions.
Rescheduling your wildlife camera can also result in enormous data efficiency. Imagine being able to manage your storage by making sure the camera only records activity during peak wildlife activity hours. As a result, you also increase the battery’s lifespan and the overall longevity of your camera.
- Prevent Technical Problems: Regular resets can help troubleshoot minor technical problems, keeping the device functional.
- Redefine Settings: Resetting provides an opportunity to adjust camera settings, such as sensitivity, trigger speed, and recording length. This allows the camera to fit well with the changing wildlife activity patterns.
- Enhance Storage and Battery Efficiency: By resetting your trail camera, you manage your storage better and increase the battery’s lifespan by sticking to peak activity hours for recording.
In conclusion, the necessity of reconfiguring your wildlife trail camera cannot be overemphasized. By incorporating this practice, you’re not just assuring the durability of your camera but also improving the quality of the images and footage it produces.
Identifying the Need to Reset Your Trail Camera
Trail cameras are powerful tools for wildlife enthusiasts, hunters or anyone needing to monitor an outdoor area. But like any device, it can run into problems demanding a system reset. Knowing the signs that your camera requires resetting can save you wasted time troubleshooting or lost footage.
Constant Flashing or Blanking Out
One of the visible signs that your camera might need a reset is constant flashing or blanking out. This can result in blurring or loss of image capture, with night photos being particularly affected. When this occurs, it’s essential to reset your camera to restore its original settings and fix the problem.
Inability to Capture Images
Another issue that suggests the need for a reset is the abrupt inability to capture images. If your trail camera stops taking pictures, it might be malfunctioning due to corrupt settings – an issue that a reset can resolve. Reviewing your camera’s settings and giving it a fresh restart can reignite its basic functions and bring it back to its optimal performance.
Deteriorating Battery Life
If you notice that your camera’s battery life is draining far more rapidly than expected, and you’ve ruled out battery quality as the culprit, it might be time to reset your device. This problem may arise due to incorrect power or camera settings that a reset can correct.
Other Software Glitches
Other less specific software glitches or malfunctions, like sudden changes in settings or frequent system errors, should raise alarm bells as an indication to perform a reset. Memory cards filling up quicker than usual, unexpected date and time changes or unresponsiveness to command buttons could all be signs of a software hitch. Resetting the camera often can set it straight.
These are all possible scenarios when a reset might be necessary. It’s good practice to be familiar with your specific camera model’s workings to troubleshoot effectively and know when a simple reset could rectify the issue.
First Steps: What to do Before Initiating Reset a Trail Camera of Your Nature Observation Device
Before you launch into the process of resetting your nature observation device, colloquially referred to as a trail camera, there are some essential preparations that need to be made. Let’s delve into what those are.
Gather Essential Tools
Before anything else, make sure that you have all the necessary tools and materials at hand. This generally includes the following:
- A paperclip or similar thin object – You’ll need this to press the ‘reset’ button which is often recessed inside a small hole to avoid accidental pressing.
- Your camera’s manual or access to the online version – This can provide specific instructions and information about your camera model.
- Fresh batteries – If you’re performing a hard reset, you should replace the old batteries with fresh ones as the resetting process can drain a significant amount of power.
Note: using damaged or leaky batteries can cause irreparable harm to your device so always ensure the batteries you’re using are in good condition. Your device’s lifespan can be significantly reduced if the battery compartment is compromised.
Back Up Your Data
Another vital preparatory step is backing up any data you don’t want to lose. A reset will wipe all the data from your device. This includes all the photos and video clips that have been captured. If there are any files that you’d like to keep, make sure you transfer them to a secure location before you begin the reset.
Ensure the Camera is Turned Off
Lastly, before kicking off the resetting process, make sure that your camera is turned off. Attempting to reset your nature observation camera while it’s still on can cause severe damage to the device’s internal system. It’s similar to attempting to fix a running car engine; always safer to turn it off first!
The Process of Switching Off Your Bushnell Trail Camera
The first step in resetting your wildlife observation camera is to switch it off. This process may sound straightforward, but it’s crucial to ensure you’re doing it correctly to prevent any damage or loss of data. Follow the instructions below to power off your trail camera safely.
Locate the power button
Your trail camera will have a designated button or switch to turn it off. This control is usually located somewhere easy to access, such as the side or the back of the camera. If you’re having trouble finding it, consult your camera’s user manual – it should provide a detailed diagram of your camera model and its control placements.
Manual Shut-Down:
Once you’ve located the power button, a straightforward press or slide should switch the camera off. Be sure to note any lights or sounds that might indicate the camera’s state. A green or red light might mean it’s still on, while a lack of lights generally indicates it’s turned off.
Waiting for the Camera to Power Down:
After you’ve turned off your camera, it’s vital to give it a few moments to complete its power-down process. The wildlife observation camera may need some time for saving any settings changes or finishing recording data. Rushing this process could interrupt these tasks and harm your camera or the data on it.
- Ensure you’ve turned off your trail camera completely before proceeding to other steps.
- Consult your camera’s manual for guidance on powering off if you’re uncertain.
It is always good to remember these tips to safely power off your trail camera, as the recovery and prevention of data loss is one of the unfortunate consequences of incorrect power down procedures.
Finding the Reset Button on Your Wildlife Trail Cam
Before you can reset your wildlife monitoring camera, it’s crucial to locate the reset button. This button is typically labeled ‘reset,’ but it can be different depending on the brand and model of your device. The instruction manual that came with your camera should include specific instructions on finding this button, but if you’ve misplaced the manual, there are a few common areas you can check.
Common Locations of the Reset Button
The reset button on many trail cameras is often found on the interior panel. This could be located behind the camera lens, near the SD card slot, or adjacent to the battery compartment. Make sure to look carefully, as the reset button can sometimes be small and inconspicuous.
In certain models, the reset function may not be a dedicated button, instead, it could be a combination of buttons. For example, you might need to hold down the ‘up’ and ‘down’ arrow buttons simultaneously or press the ‘menu’ button for a few seconds.
Note: It is always advised to reference your trail camera’s user manual for accurate information. If you do not have this, try searching online using your camera’s brand and model number to find a digital version.
- Area near the SD card slot: Some trail cameras design their reset button near the SD slot. After opening the camera, locate the SD card slot and check the adjacent area for a reset button.
- Close to the battery compartment: In few models, producers place the reset button close to the batteries. Remove the batteries from their slots and look for the reset button.
- Near the lens area: For some cameras, the reset button is near the lens area. Open the front cover of your camera and locate the reset button.
Once you’ve successfully located your trail camera’s reset button, you’re ready to proceed to the next stage of resetting your trail camera.
Third Stage: Operating the Reset Function of Your Wildlife Monitoring Device for Troubleshoot
The third stage in refurbishing your wildlife tracker involves leveraging the reset button. It’s a common method and often the quickest way to restart the functionalities of your device. Though this may differ slightly across models, the general process is essentially the same.
Firstly, locate the reset button on your device. It is usually labeled ‘Reset’ and will be a small, often recessed button that prevents accidental pushes. In some models, you might require a small thin object, like a pin or a needle, to press into the reset hole.
Do not use excessive force when pressing the reset button. Push it gently until you feel a tiny click. This click usually indicates that the device is resetting. In some trail cameras, there might be a light indicator that will blink or change color to signal that the device is resetting. Wait for a few minutes for the camera to complete the resetting process.
If your trail camera provides an audible or light indication confirming the reset, wait for this before proceeding to the next step.
- After the camera has reset, turn it off.
- Remove the batteries and wait for a few minutes.
- Reinstall the batteries and power on the device.
The instructions above should help you in resetting your trail camera, but it’s also crucial to consult your camera’s user manual. The guide usually offers model-specific advice, which is indispensable in cases where the generic instructions could vary.
In conclusion, resetting your trail camera through the reset button is a relatively hassle-free task. Within a few minutes, you should have your device functioning correctly, ready to capture high-quality images and videos of wildlife activity.
Understanding What to Anticipate Post-Trailing Camera Reset Password
After you have successfully reset your nature surveillance camera, there are few things you should understand about the default settings. These settings are the manufacturer’s pre-defined configurations that the camera reverts to following a reset.
Time and Date: One of the first things you’ll notice after a reset is the change in the camera’s time and date settings. They will typically revert back to the factory defaults. Ensure you reconfigure them based on your current location and time zone.
Quality Settings: In most cases, the photo or video quality resets to factory standard. This might not be the best resolution possible for your camera model. Hence, adjusting the resolution and quality settings to get the best out of your camera is crucial.
Trigger Settings: The settings for trigger speed and intervaled captures usually go back to the original ones. Depending on your needs, you may need to customize this according to your observations and experiences.
Other Settings You Should Check
- Battery Saving Mode: If your camera had a battery-saving mode, it would likely be turned off as a result of the reset. Don’t forget to turn it back on if required.
- Infra-red Settings: You may have to readjust your infrared or flash settings for capturing images at night. The reset might have disrupted these settings.
- Memory Settings: If your camera model uses a memory card, ensure that the memory settings are correctly configured after the reset.
Every trail camera model may have different additional features and add-ons, and the reset might affect them differently. Hence, always keep the user manual handy to understand these peculiarities and to help in the resetting process.
Setting Up Your Trail Camera Post Reset
After successfully resetting your trail camera, the next phase involves setting it up again. Be aware that restoring your camera to its factory settings erases all data and customized configurations. Hence, you must configure it from scratch.
Trail Camera Configuration Essentials
When starting the configuration process, ensure you understand the essential settings of your trail camera. These settings differ from model to model and are purpose-specific. Hence, the setup might change based on whether you are using the camera for wildlife observation, home security, or hunting. Standard settings may include:
- The time and date need to be correctly set. This feature is vital to know when the images were captured.
- Choose the right image quality. Most trail cameras allow you to select the resolution of your images. High resolution offers better image quality but uses more memory.
- Configure the trigger speed. This refers to the time the camera takes to capture an image after detecting movement.
- Set up the recovery time. This is the time the camera needs to be ready to take the next picture.
It’s also important to remember that trail cameras generally come with a dreaded ‘default’ mode, which could potentially override your customized settings. Check your user manual to find out how to disable this mode.
Lastly, if you’ve followed the instructions closely, and your trail camera is still not functioning correctly, it’s advised to reach out to the camera’s manufacturer or consult with a local trail camera expert directly. Sometimes, a camera might have a specific issue that requires professional troubleshooting and fixing.
Issues and Solutions When Stop Working Your Trail Camera
As you strive to bring your wildlife or outdoor camera back to its original configuration, you may face a few challenges. Don’t worry! These are common issues and can be easily resolved. Let’s look at some potential problems and their troubleshooting solutions.
Difficulty in Restarting the Device
One concern that you may face is challenges in rebooting the camera. This could be due to various reasons, like a frozen interface or unresponsive buttons. Restarting the device usually takes care of this issue. If the problem persists, check the camera’s instruction manual or get in touch with the manufacturer’s support team.
Unsaved Settings after Complete Reset
If your previously changed settings fail to remain post-reset, this is another common concern. Ensure that you save any changes you make to the settings before executing a complete reset. If your device is not saving settings, you might want to check its storage or memory for potential issues.
Inability to Connect to Wi-Fi after Reset
Lastly, if you’re unable to connect your camera to Wi-Fi after a reset, the Wi-Fi settings may have been affected during the process. Try reentering the connection details and reconnecting. It’s also a good idea to check if other devices can connect to your Wi-Fi, to rule out network problems.
Troubleshooting Steps
- Restart the device: Most issues can be resolved by turning off the camera and then switching it on again.
- Check connections: Ensure all cables and memory cards are properly connected and working.
- Update the Device: If your trail camera has a firmware update available, consider installing it. Updates often fix known bugs and improve functionality.
- Check the instruction manual: If problems persist, the instruction manual can provide solutions tailored specifically to your model of trail camera.
- Contact support: Reach out to the manufacturer’s customer support team for expert assistance.
With these troubleshooting solutions at hand, resetting a trail camera should be a seamless task, so you can get back to capturing spectacular wildlife images!
Caring for Your Wildlife Surveillance Device After Master Reset
Once you have completed a master reset on your wildlife surveillance device, in order to continue obtaining high-quality images and video, it’s essential to acknowledge certain maintenance practices. Regular care not only guarantees optimal performance but also prolongs the lifespan of your unit.
Daily Maintenance of Your Camera
It’s crucial to interact with your camera on a daily basis to ensure everything is working as expected. Verify that all compartments are closed tight to prevent dust and water intrusion, affecting the sensitive electronics inside. After a master reset, it’s a good habit to check your camera settings regularly to ensure everything is running smoothly. Also, bear in mind that leaving your camera exposed to harsh weather conditions for extended periods can have detrimental effects on its performance and longevity—cover it appropriately to provide better protection against harsh environmental elements.
Remember, your wildlife surveillance device relies heavily on batteries for power. Thus, check the battery level often, especially after using the master reset option, and replace them when needed for a continuous power source.
Periodical Cleaning of the Device
Ensure you periodically clean your wildlife surveillance camera to continue achieving clear and high-quality images and videos. Dust and filth accumulation could block the camera lens or motion sensor, hence affecting their functioning. Use a soft, clean cloth to gently wipe off any dirt on the exterior casing. For the camera lens and sensor, use an appropriate cleaning solution and a microfibre cloth to keep them free from dirt and smudges.
- Ensure all compartments and settings are correct
- Check battery levels
- Clean any accumulated dust or dirt
With these simple yet effective practices, your trail camera will always be ready to capture the finest moments in the wild, even after a master reset.
Essential Suggestions for Effectively Rebooting Your Muddy Trail Camera
When you want to reboot your backcountry surveillance device, consider several principles which would streamline the process and assure its smooth running. Taking into account the type, brand, and model of your equipment, this procedure might slightly vary. But, some general recommendations apply to virtually any device.
Check the Camera’s User Manual
Initially, do not disregard the operating instruction that comes with the camera. It is usually specifically designed for your item and should provide a clear outline of resetting process. If your manual is missing or not handy, consider looking for an electronic version online on the manufacturer’s site.
Regularly cleaning your device, double-checking the settings, and turning it off correctly when not in use could lessen the need for frequent resets. Yet, if your camera starts exhibiting suspicious behavior or malfunctioning, a quick reset can often be a quick solution.
Preserve Your settings
Before resetting your camera, make a note of your current settings, as they will need to be re-entered once the system is reset. This includes things like event numbers, trigger delays, and photo or video settings. If your camera maintains a log file, it might contain valuable data about detected movements or events, so remember to make a backup.
- Turn the camera off before you start
- Ensure that the batteries are not low
- If available, use the camera’s reset button
- Reboot the camera using its interface
- Confirm the reboot or wait until it restarts
Following these guidelines should make resetting your trail camera a quick and straightforward task. Regular maintenance and cautious handling is a crucial part of successfully using any piece of electronic equipment, including surveillance games cameras.
Remember, if your camera proves to be troublesome even after a reset, it might be time to consult with the manufacturer or professional technician for help. Always prioritize safety and caution over saving a few minutes during the process.
FAQ: How do i reset my trail camera
How do I format the SD card in my trail camera?
To format the SD card, first ensure the camera is off, then insert the SD card. Power on the camera, enter the setup mode by navigating through the camera’s menu using the buttons next to the LCD screen. Find the “Format” option, and select it, usually by pressing the “Enter” or “OK” button. Confirm your choice if prompted. This will erase all data on the SD card, so ensure you’ve backed up any important files.
My new camera isn’t powering on. What should I do?
First, make sure you’ve inserted new batteries correctly, matching the polarity symbols in the battery compartment. If using rechargeable batteries, ensure they’re fully charged. If the camera still doesn’t work, check for any visible damage or corrosion in the battery compartment. If the problem persists, it’s possible that the camera is faulty and you should contact the manufacturer or retailer’s customer service.
What steps should I follow to reset the password on my trail camera?
To reset the password, you’ll often need to press and hold specific buttons on the camera, though the exact method can vary between models. Typically, you’d press and hold the “Enter” button (or equivalent) while turning the camera on, then enter a default digit code provided in the manual. If these steps don’t work, contact the manufacturer’s customer service for guidance.
How long is the warranty period for most trail camera manufacturers?
The warranty period can vary widely among trail camera manufacturers, but it typically ranges from one to three years from the date of purchase. Always check the warranty details provided in your user manual or manufacturer’s website for specific information.
Why should I consider using lithium batteries in my trail camera?
Lithium batteries are known for their long life and ability to function in extreme temperatures, which is beneficial for outdoor devices like trail cameras. They also provide a consistent voltage level, ensuring the camera operates effectively, and don’t suffer from the reduced performance in cold weather that alkaline batteries do.
My trail camera’s LCD is not displaying anything. What could be the issue?
It’s possible that the camera is experiencing power issues. Check if the batteries need to be replaced or are inserted correctly. If the batteries are functional, the LCD itself might be faulty. Try resetting the camera by following the steps in the manual. If the issue remains, contact the manufacturer.
How do I check if my SD card is compatible with my trail camera?
First, consult your camera’s manual for the recommended SD card specifications. Then, insert the SD card and power on the camera. If the camera doesn’t recognize the SD card, it might not be compatible, or the SD card might be faulty. You may need to try a different card or contact the camera’s customer service for assistance.
How can I enter the programming mode on my trail camera?
Typically, you’ll need to power on the camera and then press the “Menu” or “Setup” button. This action should bring up the programming interface on the camera’s LCD. From here, you can navigate through different options using directional buttons and select them with the “Enter” or “OK” button. For model-specific instructions, refer to your camera’s manual.
Is it normal for wireless trail cameras to drain batteries quickly?
Wireless trail cameras can drain batteries faster than non-wireless ones due to the extra power required for the wireless feature, especially if they’re transmitting over long distances or uploading large files. Using lithium or high-quality rechargeable batteries can help extend battery life.
My trail camera stopped working properly after a heavy rain. What should I do?
First, remove the batteries and SD card and let the camera dry completely. Check to see if there’s any visible water damage or corrosion. If after drying, the camera doesn’t work, it might have water damage, and you should contact the manufacturer for possible repair or replacement, especially if it’s still under warranty.
How can I retrieve or reset a forgotten passcode on my Campark trail camera?
If you’ve forgotten your passcode, you’ll need to reset your Campark trail camera to its factory settings. This usually involves pressing a reset button located inside the camera’s housing while the camera is off. Consult your camera’s user manual for the exact procedure, as this can vary between models. After the reset, the camera will revert to default settings, and you can set a new passcode. If the standard reset procedure does not work, contact Campark customer service for further instructions.
My Campark camera stopped working. Should I repair it or buy a new one?
Evaluate the cost-effectiveness of repairing versus replacing. If the camera is under warranty, the manufacturer may repair or replace it at no extra cost. For cameras out of warranty, compare the repair cost quoted by Campark or a reputable electronics repair shop to the cost of a new camera. If the repair cost is significantly lower than buying a new one, and the camera has served you well, you might opt for repair. Otherwise, a new purchase might be more economical.
How long is the typical lifespan of Campark trail cameras?
Campark trail cameras are designed to withstand outdoor conditions and can last several years with proper care and maintenance. Factors affecting longevity include exposure to extreme weather, frequency of use, and battery type. Regularly clean your camera, protect it from the elements as much as possible, and use high-quality batteries to extend its life.
Why won’t my 12-volt power plug work with my Campark camera?
First, ensure the plug is fully inserted into the camera’s power slot and that the power source is active. If it still doesn’t work, inspect both the plug and the camera’s power port for any physical damage or debris. Test the power source with another device to confirm it’s functioning. If the issue persists, there could be a compatibility problem or an internal fault in the camera. It’s recommended to contact Campark customer service for specific troubleshooting or possible warranty coverage.
I’m following these steps but my Campark camera still won’t operate. What should I do?
If you’ve followed all provided instructions and the camera fails to operate, there might be an issue with the camera’s firmware or internal components. Ensure the batteries are new or fully charged and that the SD card is properly formatted and compatible. If these check out, the next step is to contact Campark customer support. They can offer advanced troubleshooting and, if necessary, process warranty claims or guide you through the repair or replacement process.
Can I use a different power plug than the one provided with my Campark camera?
Using a different plug may work if it matches the voltage requirements and connector type specified for your camera model. However, using a non-standard power plug could potentially damage the camera or reduce its lifespan due to inconsistencies in voltage or current. To ensure safety and functionality, it’s recommended to use the power plug provided by the manufacturer or an approved alternative. If in doubt, contact Campark for clarification or recommendations.
I’m unfamiliar with setting up my new camera; can you guide me through the following steps?
Certainly! Setting up a camera typically involves a few primary steps. First, insert the battery or connect it to a power source. Then, if it uses a memory card, ensure it’s correctly inserted. Turn the camera on and navigate the settings to adjust the date, time, and preferences. Familiarize yourself with the basic buttons and functions, like zoom, focus, and shooting modes. Consult the user manual specific to your camera model for detailed instructions and illustrations. If you run into any issues or uncertainties, the manufacturer’s website or customer support can offer additional guidance.