It’s clear to see why many people choose Nest Camera as their reliable, real-time home security system. This highly intuitive device provides exceptional surveillance of your household, no matter where you are. However, moving your Nest Camera to a new wireless network can appear to be a complex task, but it doesn’t have to be. This article will help you in making a successful transition with minimum hassle.
Whether you have recently changed your internet service provider or are simply updating your WiFi details, syncing your Nest Camera with the new network is integral to the continued functioning of the system. Although it might seem daunting, with the correct procedures and guidelines, this process can actually take just a few minutes of your time.
Through following this comprehensive tutorial, you’ll get to know the step-by-step process of setting up your Nest Camera with a new WiFi connection. Eliminate unnecessary stress and ensure that your home security maintains the same supreme level as before.
Don’t let the challenges of technology deter you from enjoying the countless benefits offered by the Nest Camera. Become a pro at handling your device and safeguard your home with ease.
Getting the Hang of Your Nest Surveillance Device: A Brief Outline
The Nest Camera, a product of Google’s Nest brand, is a versatile home surveillance device that comes packed with numerous impressive features. These cameras can provide 24/7 live video feeds, send alerts to your phone when they detect activity, and even distinguish between a person and a thing. This overview will help you get a clearer picture of your Nest Camera’s functionalities.
Different Flavors of Nest Cameras
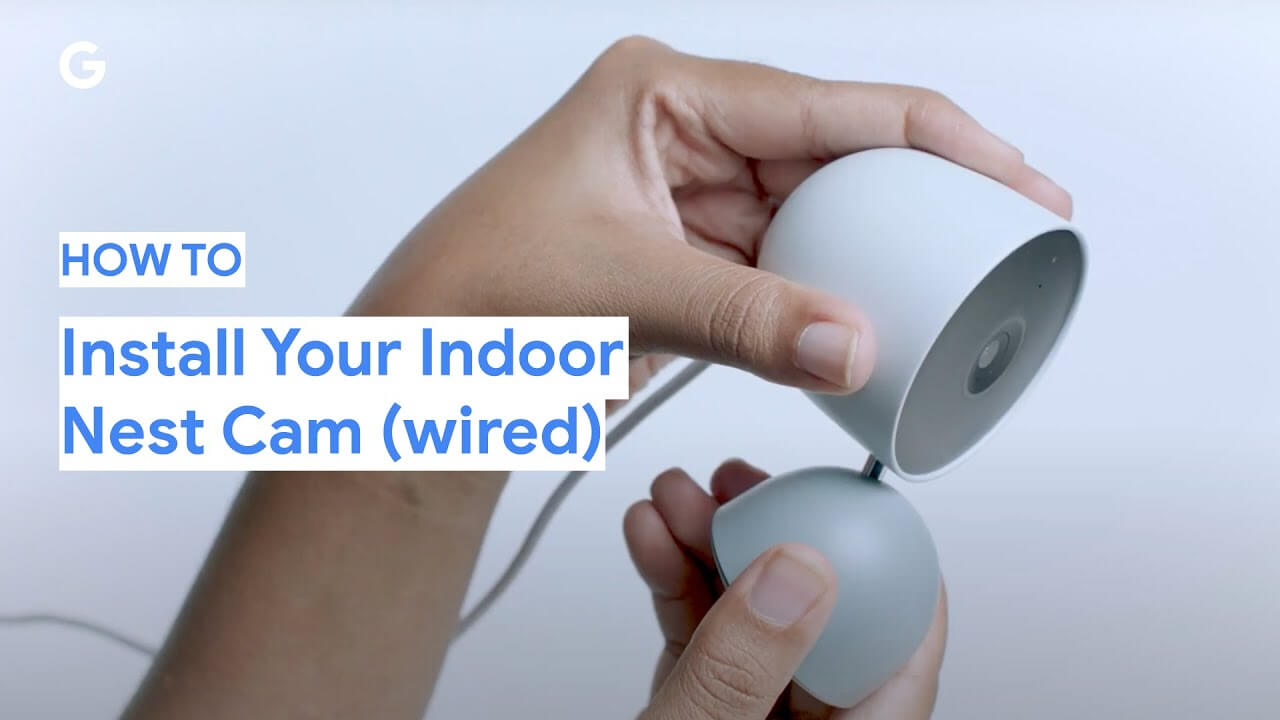
Nest Cam Outdoor and Nest Cam Indoor are the standard options available. Both come with splendid 24/7 live video quality, a 130-degree wide-angle view, and the ability to send alerts to your phone when they spot activity.
Nest Cam IQ Outdoor and Indoor models are the advanced versions which, in addition to standard Nest Camera features, have the ability to even track a person’s movement within its field of view.
Beyond product models, learning about key features is imperative to understanding your camera’s functionality.
Riveting Features of Nest Camera
- Intelligent Alerts: Nest Cameras can send alerts to your phone or email when unusual activity is detected. These alerts can even include a photo from the event.
- Supersight: Exclusive to Nest Cam IQ models, Supersight combines 4K resolution, close-up tracking view and a 12x digital zoom to enhance details even when viewed from a significant distance.
- Talk and Listen: Nest Cameras allow you to not only listen in but to also speak out through the camera’s speaker, adding another level of interaction.
- Activity history: With Nest Aware subscription, you can access your video history from the last three hours.
In conclusion, Nest Cameras provide different options depending on one’s requirements, each made distinct by its cutting-edge features. By familiarizing yourself with the specifics of your Nest Camera, you can truly optimize the safety of your home.
Justifications for Switching Your Nest Security Device to a Different Wireless Network
Often, individuals may wonder about the necessity or benefits of switching their Nest security camera to a new WiFi connection. However, several key reasons may prompt you to make this switch. Starting with instances such as moving to a new location, changing internet service providers, or upgrading your wireless router. Also, you may need to connect your Nest camera to a different WiFi network to increase effectiveness, improve security, or broaden your network coverage.
Enhancing Security
Often, established WiFi connections may become vulnerable to security threats over time. It’s important to periodically review and update your WiFi network to ensure it offers maximum security. Switching your Nest camera to a new, more secure WiFi network will provide enhanced protection against potential cyber threats.
Better Connectivity
One of the most common issues with wireless networks is inconsistent or weak signal strength. If your Nest camera is connected to such a WiFi network, it may not function optimally. Moving your device to a new WiFi network with better signal could significantly improve its performance by ensuring continuous surveillance and timely push alerts.
Expanding Network Coverage
If you are expanding your surveillance area or simply relocating your camera to a farther spot, connecting to a new WiFi network might be necessary. Networks vary in their range coverage. An upgraded network or a different network located closer to your device would provide better reception.
Relocating or Changing ISP
If you change your location or switch to a new Internet Service Provider (ISP), it would also necessitate changing the WiFi network your Nest camera is connected to. Since the device relies on internet connectivity for its operation, a change in your ISP or physical location would definitely require a new WiFi connection to remain operational.
Getting Ready: Crucial Steps in Setting Up Your Nest Cam for WiFi Connectivity
Before you proceed with getting your Nest cam synced up with a new WiFi network, it’s essential to prepare and have certain key factors in place. These steps will not only make the connection process smoother, but also ensure that the connection is stable and secure.
Equipment Check
Before diving into the connection process, carefully inspect your equipment to ensure it’s properly working. Primarily, the three elements that need to be in good condition are – your Nest cam, the WiFi router, and the device (smartphone or computer) from which you’ll control the Nest cam. If any of these elements are dysfunctional or outdated, you may experience issues while trying to establish the connection.
Establishing WiFi Setup
Make sure your WiFi set-up is ideal for the connection. The WiFi network should be stable, reliable, and has strong signals preferably above – 67 dBm for a steady connection. An unstable or weak WiFi network can cause disruptions in camera’s live feed and notifications.
Setting Up the Nest App
You will need the Nest app to control the Nest camera settings. If you haven’t already, download the app on your smartphone or computer. It’s vital to regularly update the app to the latest version to reap its full benefits. Furthermore, knowing your way around the Nest app will be critical when it comes to connecting the Nest camera to the WiFi.
Securing Your Network
The last step in preparing to connect your Nest camera to WiFi is securing your wireless network. Ensure that you have a strong password for your WiFi network that is hard to guess. In addition, setting up a separate guest network for your IoT devices can also have a positive impact on your primary network’s security.
By checking off these key preparation steps, you’re setting yourself up for an easier process to connect your Nest camera to a new WiFi network.
Starting Out: Verifying Your Web Connection and Wireless Network
Inspecting Your Web Connection
Before you commence the process of linking your Nest Camera to a fresh wireless network, it’s invaluable to inspect the strength and stability of your internet connection first. A majority of connection issues stem from weak or unstable internet connections. You can assess the state of your internet connectivity by navigating to an online speed test site. If the results showcase a slow connection speed or if the connection drops intermittently, it’s recommended to either restart your router or get in touch with your Internet Service Provider (ISP).
Assessing Your Wireless Network
Once you have affirmed that your internet connection is stable, the subsequent step is to evaluate your wireless network. Check to see if your network is visible and accessible to all your devices, not just the Nest Camera. Most devices can promptly identify and connect to visible networks. Therefore, if your wireless network fails to appear on the list of available networks, it is advisable to restart your router or reset the network settings.
Note: Always ensure that the WiFi network you’re planning to connect to is secured with a password. An unsecured network can render your devices vulnerable to potential security risks.
Other pre-requisites to keep in mind
- The WiFi network should have an active internet connection.
- The network should be operating on a 2.4GHz band as Nest cameras are unable to connect to 5GHz networks.
- Ensure that the device’s software is up-to-date to avoid compatibility issues.
Locating the Specifications of Your Nest Surveillance Gear
This guide will walk you through the crucial second step in linking your Nest surveillance equipment to a new Wi-Fi network: discovering the parameters of your device. The settings menu on your Nest camera is an all-in-one stop for adjusting the configurations, including the wireless network that your device is connected to.
Accessing the Nest App
To start, you will need to access the Nest app on your smartphone or tablet as all necessary adjustments can be made here. This application acts as the main control center for your camera. If you haven’t already installed the software, you can easily download it from major app stores. Simply look for the Nest app and install it following the instructions given by your device.
Navigating to Your Camera Settings
Once you have opened the app, you will find a list of your connected devices on the homepage. Select the camera whose settings you wish to change to proceed. This action will open a live view of the chosen camera. Here, you will see a gear-shaped icon or a ‘settings’ option, usually located on the top right of the screen. Tapping on this will direct you to your camera’s settings.
Identifying the Settings You Need
In your device settings, you can find a variety of options, from image quality and notifications to network settings. The parameters of interest for this guide are the network settings. After accessing the settings, keep scrolling until you find a section labeled ‘Wi-Fi Connection’ (or something similar). This is where you can view your current network and change it, if necessary.
Remember to keep your new Wi-Fi network’s password handy during the process as you will need it to complete the connection.
Keep in mind:
- This guide is applicable for different models of Nest cameras, even though the terminology in the app may slightly vary.
- Ensure you are within range of your new Wi-Fi network while performing these operations.
- Some changes to settings might need your device to restart, so ensure this will not interrupt any important recording.
Selecting a New Wireless Network for Your Nest Surveillance Camera
Once you are in ‘Settings’ in your Nest app, the third step involves picking out a fresh wireless network for your nest security camera. This crucial stage requires careful consideration and certain caution.
Things to Remember When Choosing a New WiFi Network
Firstly, it’s essential to remember that your Nest Cam requires a network with a reliable internet connection. The camera continuously uploads video to the cloud; thus, a stable and reliable connection is vital to ensure seamless operation.
Some other aspects to consider are:
- Network speed: A high-speed internet connection is recommended for the best performance.
- Network congestion: Many devices connected to the same network can slow down its speed. If this is your case, you might want to consider dedicating a network for your Nest Cam.
- Network security: Always choose a secured network. Unsecured networks leave your device and data vulnerable to breaches.
After you have decided on a suitable network, scroll down to the ‘Home Wi-Fi help’ section. Ensure that your selected network’s signal can reach your camera by considering factors such as distance, physical obstructions, and WiFi interference.
Next, tap on the ‘Wi-Fi connection’ option and then on ‘Add a network.’ From the list of available Wi-Fi networks, select your chosen network. Enter the password if required and click ‘Join.’ Your Nest camera will now connect to the selected network. Ensure your device stays online while this process is ongoing. After successful connection, a message to that effect will appear on the screen. Congratulations! Your Nest Cam is now connected to a new WiFi Network.
The Fourth Step: Linking your Nest Camera to your new Internet Network
Once you have ensured that your Nest Camera is in its reset state, the next phase involves connecting it to your new wireless network. During this step, it is essential to have both your new WiFi network details and your Nest Camera close by.
Now, on to the connection process; open your Nest app on your smartphone device, select the ‘Settings’ option, and then tap ‘Add product.’ You should see a QR code on your Nest device; scan it. Your phone will prompt you to connect to a WiFi network.
In the ‘Network’ section of the page, you’ll need to tap on the name of your new WiFi and input your password. Ensure that the details you type in are correct to avoid any connection errors. If executed correctly, your Nest Camera should now be linked to your new WiFi network.
- In case your new network is not visible, refresh the network list.
- If your Nest Camera doesn’t connect, verify the network credentials again.
- If the problem persists, restart your device and try the procedure again.
Test the Connection
Once you have linked your Nest Camera to the new wireless network, it’s a good practice to test whether the connection is functional. You can do this by live streaming the video from the Nest Camera on your device. If there is uninterrupted streaming, then the connection is successful.
Remember, the connection quality depends largely on the strength of your WiFi signal, so make sure your camera is within a good range. That’s all it takes to connect your Nest Camera to a new WiFi network.
Verifying the Connection of Your Nest Surveillance Camera
Once your Nest camera has been set up to a new WiFi network, it is crucial to confirm that the connection has been established correctly and is functioning. Checking the connectivity will ensure that your surveillance setup is running smoothly and will allow you to fully utilize the capacities of your Nest camera.
Here are some simple steps to help you validate the connection of your smart surveillance equipment:
1. Run a Quick Test
First, carry out a quick and straightforward test by streaming live video from your camera. Open the Nest app, find the camera in your device list, and try to watch the live feed. If you can view the live video without any issues, this indicates a successful connection.
2. Validate Status Indicator
Secondly, check the status light on your Nest camera. The light should be green, which signifies that the device is connected to the network and working properly. If you see a yellow light, it’s an indication that there’s a problem with the network connection.
3. Use the Connection Test Feature in the App
Finally, use the Test Video Quality feature within the Nest app. This tool will check your camera’s video quality, bandwidth, and connection stability, providing you with a clear overview of its performance. To access this feature, go to the Nest app, tap on your camera, select ‘Settings’, followed by ‘Test Video Quality’.
By following these steps, you can confirm the proper connection of your Nest camera to your new WiFi network. Regularly checking the connection ensures you can maintain a reliable home security system. Remember, a properly connected and functioning Nest camera provides the peace of mind that comes with knowing your home is being watched over.
Resolving Nest Camera Wireless Connection Issues and Valuable Advice
If your Nest security camera can’t connect to your WiFi network or keeps dropping the WiFi link, there are a few potential solutions you can explore. This article gives you some troubleshooting techniques and tips to guarantee a stable and reliable connection between your Nest camera and new WiFi network.
Essential Troubleshooting Methods
First off, confirm that your WiFi router is functioning correctly. A quick restart of your router might resolve any minor glitches or internet hang-ups. You might also need to check your WiFi network settings and ensure that your Nest camera is roughly within the same signal range as other devices that work perfectly.
Upgrading your router’s firmware could potentially fix compatibility issues with your Nest Camera. To find out if any updates are available, check out the manufacturer’s website or contact their customer service.
If your WiFi network doesn’t show up during the Nest camera setup process, try switching your router’s broadcasting channel. It’s possible that your Nest camera is not compatible with the channel your router is currently using.
Helpful Tips for a Stable Connection
- Internet Speed: Ensure that your internet connection has sufficient bandwidth for your Nest camera. You can check your internet speed using various online tools.
- Camera Location: Your Nest camera should be within a reasonable range of your router to maintain a strong WiFi signal. Avoid placing the camera near to other devices that emit wireless signals to prevent potential network interference.
- WiFi Network Security: Choose a secure encryption method for your WiFi network. Weak or no network security is not just unsafe, but can also negatively affect the performance of your devices, such as your Nest camera.
By using these solutions and tips, you can surely improve the connectivity performance of your Nest camera to your WiFi network. Make these tips part of your usual maintenance routine to ensure a secure and consistent WiFi connection for your Nest camera.
FAQ: How to connect nest camera to new wifi
How do I factory reset my Google Home or Nest device?
To factory reset a Google Home or Nest device, hold down the physical reset button on the device until you hear confirmation that it’s resetting. The process varies slightly depending on the model.
Can I change the Wi-Fi network my Google Home connects to without resetting the entire device?
Yes, open the Google Home app, select your device, tap on the settings in the top-right corner of the screen, and change the Wi-Fi network under Wi-Fi settings.
What should I do if I want to connect my Google Home to a new Wi-Fi network?
Open the Google Home app, select your device, and go to Wi-Fi settings. Then choose to connect to a new network and enter the network’s name and password.
How do I update the Wi-Fi information on my Nest Thermostat through the Nest app?
In the Nest app, select your thermostat, tap on the settings icon, and update the Wi-Fi network name or password under the network settings.
If I change my Wi-Fi router, do I need to factory reset my Google Nest products to connect them to the new router?
You don’t need to factory reset. Just update the Wi-Fi settings in each Google Nest product through the Google Home or Nest app to connect them to the new router.
How do I connect my new camera or doorbell to my home network using the Google Home or Nest app?
To connect a new camera or doorbell, open the Google Home or Nest app, select ‘Add a new device’, and follow the on-screen instructions to connect it to your home network.
What steps should I follow to connect my smart home devices to a different Wi-Fi network?
Open the Google Home app, select the device you want to connect to a new network, tap on the settings, and change the Wi-Fi information under network settings.
If I change my Wi-Fi network name and password, what do I need to do with my Google Home devices?
You need to update the Wi-Fi settings on each Google Home device. Open the Google Home app, go to each device’s settings, and enter the new Wi-Fi network name and password.
How can I scan the QR code to connect Google Nest camera to my Wi-Fi network?
When setting up a new Google Nest camera, the app may prompt you to scan a QR code, usually found on the camera. Use your mobile device’s camera to scan the code and follow the app’s instructions.
If I get a new router, what is the process for changing Wi-Fi networks on my Google Assistant-enabled smart speakers and displays?
For smart speakers and displays, open the Google Home app, select the device you want to connect to the new router, and update the Wi-Fi network information in the device settings.
How do I change my Wi-Fi network on a Google Nest device?
To change your Wi-Fi network on a Google Nest device, open the Google Home app, select your device, go to settings, and update the Wi-Fi network information under network settings.
What steps should I follow to connect my camera to a new Wi-Fi network?
To connect your camera to a new Wi-Fi network, use the associated app, select the camera, and choose the option to change the network. Select the new network from the list and enter the password.
How can I reset my device and set up a new device on my existing Nest account?
Perform a factory reset on your device by following the manufacturer’s instructions, then use the Nest app to add it back to your Nest account as a new device.
What process should I follow to ensure my camera connects to the internet successfully?
Make sure your Wi-Fi network is working properly. Use the app associated with your camera, select the network from the list, and enter the correct Wi-Fi password.
If I need to change my Wi-Fi password, what steps should I take to update my connected devices?
After changing your Wi-Fi password, you will need to update the password on each connected device. Open the device’s app, go to Wi-Fi settings, and enter the new password.
How do I use the Nest app to view live footage from my camera on my mobile device?
Open the Nest app on your mobile device, select the camera you want to view, and you should be able to view live footage if the camera is connected and functioning properly.
What should I do if I want to remove a Google Nest device from my app and add it back later?
To remove a Google Nest device from the app, go to the device settings in the app and select the option to remove it. To add it back, use the ‘Add a new device’ option and follow the setup instructions.
How can I use Google Assistant to control my Google Nest camera?
Link your Nest account to Google Assistant via the Google Home app. Once linked, you can use voice commands through Google Assistant to control your Nest camera.
What are the necessary steps to follow to reconnect my camera after changing Wi-Fi networks?
Reset your device to reconnect to the new Wi-Fi network. Use the camera’s app, select the new Wi-Fi network from the list, and make sure to save the new settings.
How do I ensure that my Google Nest device reconnects to the internet after a network change?
After changing your network, reset your Google Nest device and use the app to connect it to the new network. Be sure to enter the correct Wi-Fi password and save the settings.