Photography is both an art and a science, presenting us with the challenge and joy of capturing slices of reality as beautifully and authentically as possible. Among numerous elements that contribute to achieving this goal, incorporating a grid into your camera viewfinder is widely recognized as an invaluable tool. It aids in composing shots with precision, by aligning the elements within a frame to attain a certain aesthetic balance and coherence.
This detailed guide is designed to explore the concept of effective grid usage while taking photographs. By mastering the grid, you can heighten the visual impact of your photos, making your shot not just attractive but also compelling. Through this guide, both beginners and intermediate photographers will understand better how to get the most out of their camera’s grid mode.
Get ready to take your photography skills to new heights, improving the composition and quality of your photos with the strategic use of grids. Whether you are a hobbyist looking to make your photos more appealing or an aspiring professional keen on crafting visually resonant images, this guide promises to be an enriching journey into harnessing the power of the grid in photography.
The Significance of Gridlines in the World of Photography
Gridlines in photography serve as essential tools in framing and composing a photo. Having a clear appreciation of why these lines are crucial can significantly enhance the quality of your images while simplifying the photographic process.
Gridlines spring from the theory of the rule of thirds, a fundamental concept in visual art, including photography. This rule is a guide that suggests dividing an image into nine equal parts by two equally spaced horizontal lines and two equally spaced vertical lines, thereby forming a 3×3 grid. The belief is that placing points of interest along these lines, or intersections, makes a photo more balanced and enables viewers to interact with it more naturally.
Benefits of Utilizing Gridlines
- Balance: By using gridlines, photographers can evenly distribute the elements in their pictures to create more appealing and balanced compositions.
- Guidance: Gridlines guide the eye of the viewer across the photograph, thus creating a flow that’s smooth and logical.
- Focus: A strategic placement of subjects along or near the gridlines brings them to focus, making the photo’s story clear.
While grids might seem like a constraining feature, they’re merely guides. They help you to see the balance in your shots more effectively, and you’re always free to ignore them when suitable. Good photography is about breaking rules when it serves your creative vision. Nevertheless, understanding and mastering these rules first is key in using them effectively or breaking them knowingly.
Enabling Gridlines on Your Camera
Enabling the grid on your camera will vary depending on the make and model, but it’s usually found in the settings menu of most digital cameras and smartphones. Once activated, you will see faint lines overlaid on your camera screen to aid in composition.
In conclusion, gridlines are foundational to the practice of photography, helping create well-composed and visually engaging photographs. By giving due importance to their presence and guidance, one can significantly enhance the quality and impact of their shots.
Understanding Various Gridlines and Their Applications
When delving into the field of photography, understanding the use of gridlines is essential as they can considerably impact the end result of your photos. Different types of gridlines offer diverse framing possibilities and understanding their specific uses can help improve your compositions.
Rule of Thirds Grid
Rule of Thirds Grid is one of the most widely used types of gridlines. This grid divides your image into nine equal parts by two equally-spaced horizontal lines and two equally-spaced vertical lines. The photography theory of the Rule of Thirds suggests that placing your subject along these lines or at their intersections can make photos more balanced and engaging.
Golden Ratio Grid
The Golden Ratio Grid is another important type found in photography. It uses fibonacci’s sequence to divide your image into sections, providing points of interest that draw your viewer’s eyes. This grid helps craft visually pleasing and natural-looking compositions by aligning your subject with the grid’s intersecting lines.
Square Grid
The Square Grid crosses the entire field of view with square-shaped cells. By breaking down your image into uniform squares, it helps you capture images like landscapes or buildings. It can be effectively used for symmetry adjustments, alignment issues and straightening the horizon.
Diagonal Grid
The Diagonal Grid, as the name suggests, includes diagonal lines running across the frame. It can prove beneficial when you want to introduce dynamic tension in your photos, guide your viewer’s eyes in a particular direction, or emphasise on diagonal elements in your composition.
In conclusion, experimenting with different types of gridlines can greatly enhance your photography skills. Whether it’s the Rule of Thirds Grid for balanced images, the Golden Ratio for visually pleasing compositions, the Square Grid for perfect alignments, or the Diagonal Grid for creating tension and movement, mastering gridline usage is key to becoming a proficient photographer.
Stepwise Procedure for Enabling Gridlines on a DSLR Camera
In the field of photography, understanding composition is crucial, and gridlines that divide the screen into equal thirds can be immensely helpful in this. This article will guide you about how to switch on gridlines in a DSLR camera in an easy, step-by-step manner.
Steps to Turn On Gridlines
To facilitate a well-balanced photographic composition one needs to enable gridlines in one’s DSLR. Follow these uncomplicated steps:
- Select the Menu Button: Locate the Menu button on your DSLR. This is usually found on the back of the camera. Push it to go into the Camera’s settings.
- Navigate to The Display Setting: Scroll through the available options till you find one that controls the LCD screen or viewfinder display settings. It might be labeled as ‘Display’, ‘View’, or ‘Setup’ etc.
- Find Grid Display Option: Under the Display or View section, look for an option that refers to Grid Display or something similar.
- Switch On the Grid: Once you find the grid setting, choose ‘Enable’ or ‘On’ to activate the grid lines on your camera.
- Save Your Settings: After turning on the gridlines, make sure to save the changes. You might need to push a button marked as ‘OK’, ‘Apply’ or ‘Save’.
It’s important to note that these steps may slightly vary based on the make and model of your DSLR. When in doubt, refer to your camera’s user manual. With gridlines turned on, you’re ready to make the most of your photography shots, greatly enhancing the balance and aesthetic appeal of your images.
Remember, practice makes perfect. The more you use the gridlines, the better you will get at composing your shots, focusing on the appropriate subject matter, and creating stunning photographs.
Activating the Grid Feature on Mirrorless Cameras: A Step-by-Step Guide
Being proficient in photography is not just about understanding the basic concepts; it additionally involves mastering use of equipment. One such important feature to understand in a camera is the grid system. Using the grid system on a mirrorless camera can produce some astounding results. The grid helps in composing the shot by splitting the frame into thirds both horizontally and vertically. Here’s how you can navigate your mirrorless device and activate the grid function.
Procedure to Enable the Grid in Mirrorless Cameras
While the exact process might vary slightly from model to model, the general steps are generally the same for most mirrorless cameras. Here’s an easy method to enable this valuable tool:
- Firstly, switch on your camera. Ensure it’s in either Manual or Aperture Priority mode.
- Navigate through the settings by pressing the ‘Menu’ button usually situated at the back.
- Scroll down until you find an option like ‘Display settings’ or ‘Screen setup’. The specific terminology might differ, but intuitively, it should represent where the display settings can be adjusted.
- Once in the aforementioned settings, look for an option that says ‘Grid Display’, ‘Grid Lines’ or similar.
- Select this option, typically you will be taken to another screen where you can choose the type of grid display you prefer. Common options include Rule of Thirds, Square Grid and Diagonal Grid among others.
- After selecting your preferred grid type, confirm your selection. The grid should now be visible on your live view screen.
Remember, the grid view function doesn’t impact your actual photos and is only visible while shooting. It’s a guiding tool, a visual aid for better composition. Practice makes perfect – the more you use it, the more natural framing your images this way will become. Happy shooting!
How to Apply Grid Lines in Different Compact Cameras
Grid lines are a powerful photography tool that help improve composition and alignment in your photos. They are usually provided as an option in the settings of most cameras. However, the process to enable them might differ for various point-and-shoot cameras. Let’s go over the general steps to successfully enable camera grid lines.
Step 1: Discovering the Grid Setting
The first step always involves finding the grid setting on your device. This can typically be found within the menu settings of your camera. Look for options like Display, Screen setup, or even under Shooting settings. Remember, the nomenclature may vary according to the brand of your camera.
Step 2: Understanding Grid Options
Most cameras provide different grid options. You might find 2×2, 3×3 or even 4×4 grid lines. You also have the golden ratio grid, which is perfect for capturing harmonious compositions. Don’t hesitate to try different setups to discover what works best for your photography style.
Step 3: Activation
Once you’ve located the grid setting and selected your prefered grid type, proceed to activate it. You simply need to switch it on or select enable. Remember, this is a non-permanent change – if you find that the grid lines are distracting or not useful, you can always deselect them.
To make this process clearer, let’s provide an example using Canon PowerShot and Nikon Coolpix, two popular point-and-shoot cameras.
Canon PowerShot
In a Canon PowerShot, press the ‘Menu’ button, then use the scroll wheel to move to the ‘Camera’ tab. Scroll down the options until you find ‘Grid Lines.’ Use the scroll wheel once more to select this option and press ‘Set’ to activate.
Nikon Coolpix
On the Nikon Coolpix, press the ‘Menu’ button and navigate to the ‘Setup’ menu. Look for the option that says ‘Monitor settings.’ In this submenu, you’ll find the ‘Grid display’ option. Select it and choose ‘ON’ to activate.
In conclusion, enabling camera gridlines on various point-and-shoot cameras may involve different steps, but the basic principles are the same – navigate to the camera menu, find the gridlines settings, and turn them on.
The Power of Gridlines in Enhancing Smartphone Photography: A Guide for Android and iOS
Undeniably, incorporating gridlines can significantly enhance the quality of your smartphone photos. Available in both Android and iOS devices, this feature is a boon for both professional photographers and hobbyists. This guide offers insight into the potency of gridlines and how to use them.
Why Use Gridlines?
The principle of the rule of thirds, a widely acknowledged concept in the photography world, asserts that images are more balanced and engaging when key elements align with a particular point in a 3×3 grid. This is where the Gridlines feature on your smartphone’s camera can play an instrumental role.
Activating Gridlines on Android Devices
For Android users, activating gridlines is pretty straightforward. Check the following steps:
- Open the camera application on your Android device
- In the viewfinder, tap on the Settings icon
- Look for the Grid lines option and tap on it
- Select the 3×3 grid from the options presented
With this, the gridlines will be visible in your camera viewfinder, aiding in capturing well-composed images.
Enabling Gridlines on iOS Devices
If you are an iOS user, here’s how you enable gridlines:
- Open the Settings app on your iPhone
- Scroll down and tap on the Camera option
- Switch the toggle for the Grid option to the ON position
Once done, the gridlines will appear in your camera viewfinder, offering great assistance in improving your photography composition.
Utilizing Gridlines for Better Photos: Suggestions from the Experts
Aspiring photographers often overlook the gridlines feature on their camera, but professionals know that this tool can significantly enhance the composition of your shots. Here are several guidelines from the pros to leverage gridlines effectively when capturing photos.
Adopt the Rule of Thirds
One of the simplest ways to utilize the grid is to follow the Rule of Thirds. The gridlines on your camera split the frame into nine equal squares. To comply with the Rule of Thirds, align your subject along the gridlines or at their intersections. This calculated placement can lead to attractive, balanced shots and draw viewers’ eyes to your focal points.
Keep the Horizon Straight
Gridlines can also ensure your horizons are level. For landscape shots, align the horizon with one of the horizontal lines in the grid. This groundwork can prevent the annoyance of a subtly tilted horizon, improving the overall professionalism of your photos.
Create Depth and Balance
A lesser-known use of gridlines in photography is aiding depth perception. Placing objects along the various lines can create a sense of depth and balance, enhancing the three-dimensional feel of your two-dimensional photos.
Additional Expert Tips
- Do not get too fixated on the grid that it impairs your creativity. Gridlines are a tool, not a rule. Break free from them when the shot calls for it.
- For mobile photography, ensure the grid feature is activated in your camera settings, as it often isn’t by default.
- The central square of the grid tends to produce “flat” images. Avoid placing your subject in the middle square unless necessary.
In conclusion, the gridlines on a camera can serve as a valuable tool for photographers. Get comfortable with them and experiment in your work to discover how they can enhance your photos’ composition, balance, and depth. As with any photographic rule, however, remember that there are times when breaking it may result in an even more stunning image.
Avoid these Common Errors when Utilizing Camera Layout Lines
When endeavoring to ace photography, the use of camera layout lines or grids can indeed be a game-changer. However, adequately using these grids is not as straightforward as it may seem. Several common blunders are associated with the use of camera lines that photographers should be mindful of.
Over Reliance on the Grid
One typical issue photographers make is over reliance on the camera grid – strictly adhering to the rule of thirds. While it is a beneficial guide, it does not have to be followed slavishly in every shot. Photography is an art form, and often, breaking the rules can result in an even more compelling image.
Disregarding the Grid
On the other extreme, many photographers err by entirely disregarding the camera lines. Even if you want to get creative and break the rules sometimes, the gridlines are still an essential tool that can improve overall composition, particularly for beginners. Ignoring them completely can often lead to unintentionally skewed or unbalanced shots.
Applying Grids Post-Production
Another common mistake is attempting to apply grids in post-production, rather than while capturing the shot. This method can lead to an improperly framed photo from the start, which is much more challenging (and sometimes impossible) to remedy afterward. Therefore, it’s crucial to use grid lines during the photo-taking process for optimal framing and composition.
Assuming All Grids are the Same
Different cameras have different types of grids. Some have rule-of-third grids, some have square grids, while others might even have diagonal ones. A common mistake made is assuming that all these grids function similarly. In reality, each grid type serves a unique purpose and is ideal for various types of shots.
In conclusion, the appropriate use of gridlines can significantly improve the quality of your images. However, it’s crucial to avoid common mistakes like over-reliance on the grid, disregarding it entirely, trying to apply it post-production, and assuming all grid types are alike.
Integrating Gridlines in Various Photography Styles and Categories
The use of gridlines has become a pivotal tool for photographers looking to refine their composition skills across a plethora of photography styles and genres. They are there to guide the photographer to take perfectly balanced pictures. When the grid on your camera viewfinder is enabled, it can significantly improve the final results.
Gridlines in Landscape Photography
In landscape photography, incorporating gridlines to align the horizon line can bring out the essence of the photograph by creating a sense of tranquility. If the natural horizon line matches up with one of the gridlines, the viewer’s eyes will find their path in the photograph, which enhances the panoramic effect.
Street and Architectural Photography with Gridlines
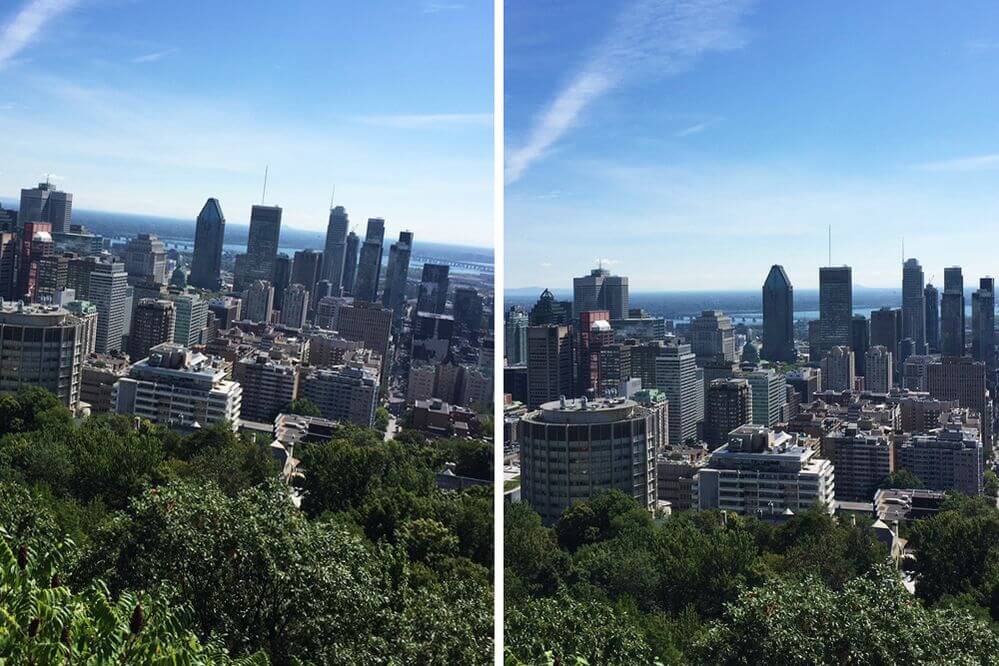
When it comes to street and architectural photography, gridlines are especially useful. They can help photographers perfectly align vertical and horizontal lines in frame, like the edges of buildings and streets. The resulting effect is a more balanced photograph that captures the unique details of the urban environment.
Using Gridlines for Capturing Portraits
In portrait photography, the grid aids in ensuring that the subject’s eyes, which are the most expressive part of the face, are positioned at one of the intersections of the grid. This approach, known as the rule of thirds, is among the most familiar composition techniques, lending an intriguing asymmetry to the final image.
Gridlines in Macro Photography
Implementing gridlines in macro photography is a bit different but still important. Due to the close proximity of the subject, it is integral to keep the object(s) on the gridlines to retain balance in the image.
Overall, gridlines are vital tools to master different photography styles and genres. Any professional or hobbyist can benefit from this tool to improve their photos’ composition and overall appeal.
Enhancing Your Craft in Capturing Images: Viewing Gridlines as a Starting Point
Embarking on the journey to enhance your image capturing skills may seem daunting, but one simple technique that can greatly improve your photography pratices is the use of gridlines or a grid system in your camera. This simple yet very useful tool aids in creating balanced and harmonious composition in a photograph.
Simply described, the grid in a camera is a series of intersecting lines, usually forming a 3×3 pattern displayed on a camera’s viewfinder or LCD screen. This pattern of lines is based on the rule of thirds, a basic principle in visual arts that suggests that an image can be divided into nine equal parts, and that aligning the subject of the photo along these lines or their intersection points creates a more balanced, aesthetically pleasing image.
By consciously using gridlines, you can strategically place the focal elements of your scene along the grid intersections to promote balance and leading lines. This way, you are guiding your viewer’s eyes along the most important parts of your shot, making your photos more engaging and visually appealing.
The use of gridlines, while helpful, is just a launchpad when it comes to mastering photography. A plethora of practices can be explored beyond the grid system. Understanding light, for instance, including its qualities and how it falls and shapes your subject, can greatly elevate the quality of your images.
Mastering the depth of field—how much of your scene is in sharp focus—can provide you with creative ways of directing your viewer’s attention, making some parts of your photo stand out more than others.
Finally, experimentation can be a stepping stone to discover techniques that work best for you and your style. Trying out different perspectives, angles, settings, and shot timings can give your photos a unique edge. Remember that rules are meant to be broken and breaking out of standard methods can lead to excellently creative results.
In conclusion, while harnessing the power of gridlines in your camera can significantly contribute to creating beautifully composed images, it is only the beginning of the journey. Delving into various elements of photography, combined with continuous practice and experimentation, will certainly prove beneficial in enhancing your craft.
FAQ: How to get grid on camera
How can using gridlines improve my photography skills?
Gridlines can significantly improve your photography skills by helping you balance your shots, align your subjects or scenery, and adhere to the rule-of-thirds. This rule suggests placing your subject at the intersection of the gridlines for a more balanced, aesthetically pleasing shot. Using gridlines can also prevent crooked images by providing a reference for straight lines and horizons in your composition.
What does beyond gridlines imply when improving my photography skills?
Beyond gridlines refers to other advanced photography techniques that go beyond the basic use of gridlines. These might include concepts like understanding light, using the right gear, post-processing images, learning to control exposure and aperture, mastering manual settings in your camera, experimenting with different photography styles and so on. Becoming a better photographer involves understanding and integrating each of these elements into your work.